Introduction
I will try to make this article as short and simple as it could be. The Good thing about this tutorial is that not a single PowerPoint Effect has been applied to create this Crab Walk Cycle animation but only looped between the slides. A had published a preview of this Crab animation on the Community Page of my Youtube Channel where you can see the Presenter View of the presentation where 9 slides are continuously running in a loop.

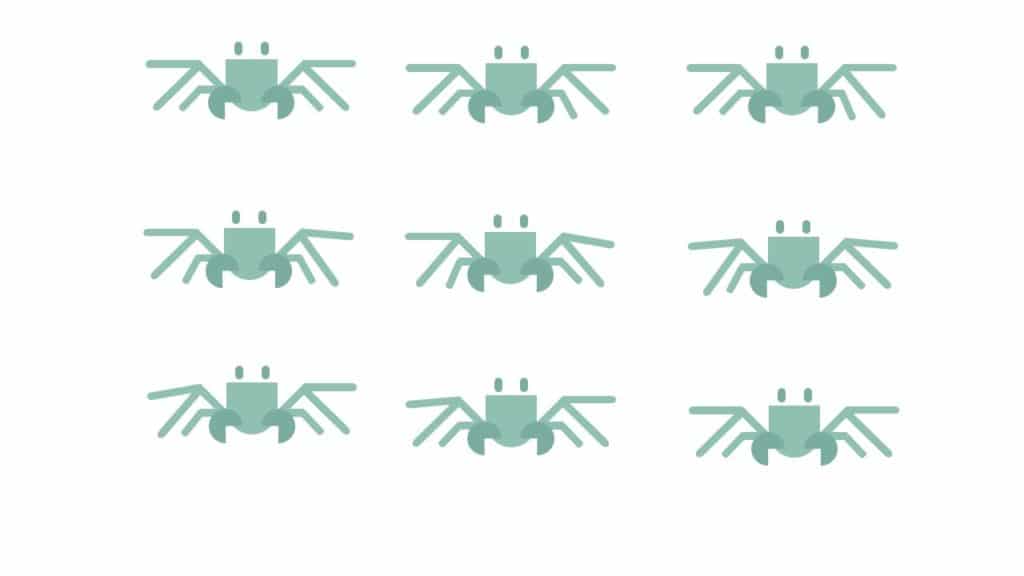
Basically, we are showing 9 different poses of the Crab on 9 different slides and then advancing to each slide within 0.05 Seconds. The Crab has been drawn using the different shapes from Shape Tools of the Insert tab. In Figure 1.1, you can see the 9 different walk poses each having different positions of the legs.
Crab Design Walk Poses
The original animation inspiration is from: https://dribbble.com/shots/3036222-Crab-Walk-Animation
Define Custom Anchor Points
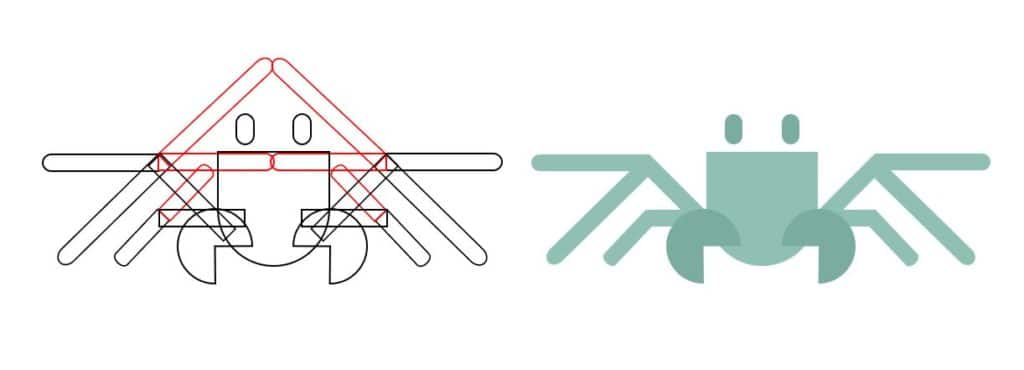
Take a look at the Wireframe view in Figure 1.2, where you can see additional objects (in Red) have been grouped with the Legs to create a Custom Anchor Point. The idea was to draw a single Crab character using shapes having Custom Anchor Point and then after duplicating the slide, you can easily move the Crab Legs to the desired position.
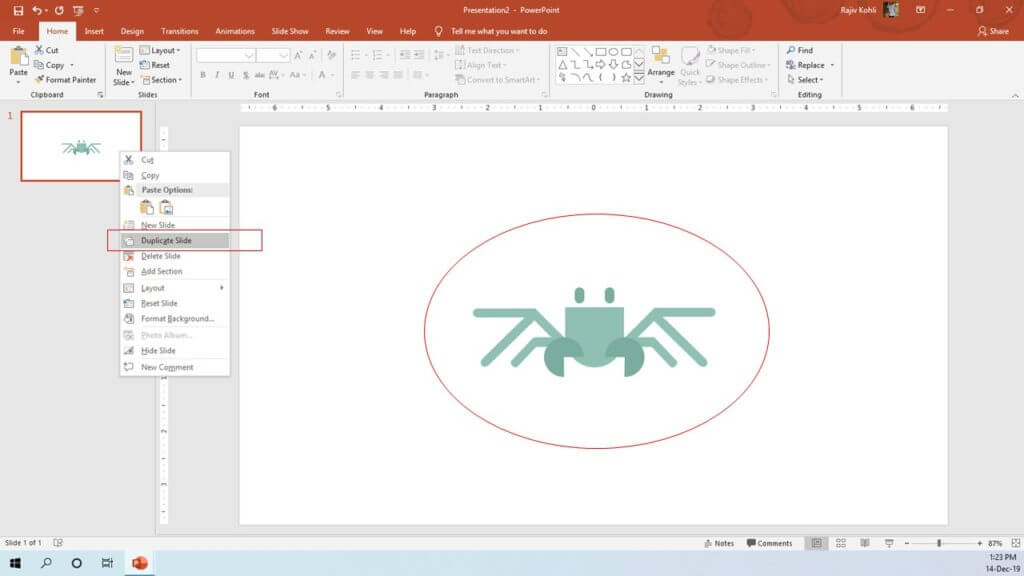
So, once you have the Crab character ready; duplicate the slide as shown in Figure 1.3, and then on the second slide change the position of one of Crab’s Leg as shown in Figure 1.4:
4 PPTX Files inside the RAR File.
Defining Custom Anchor Points to specific object helps you to reposition the object freely.

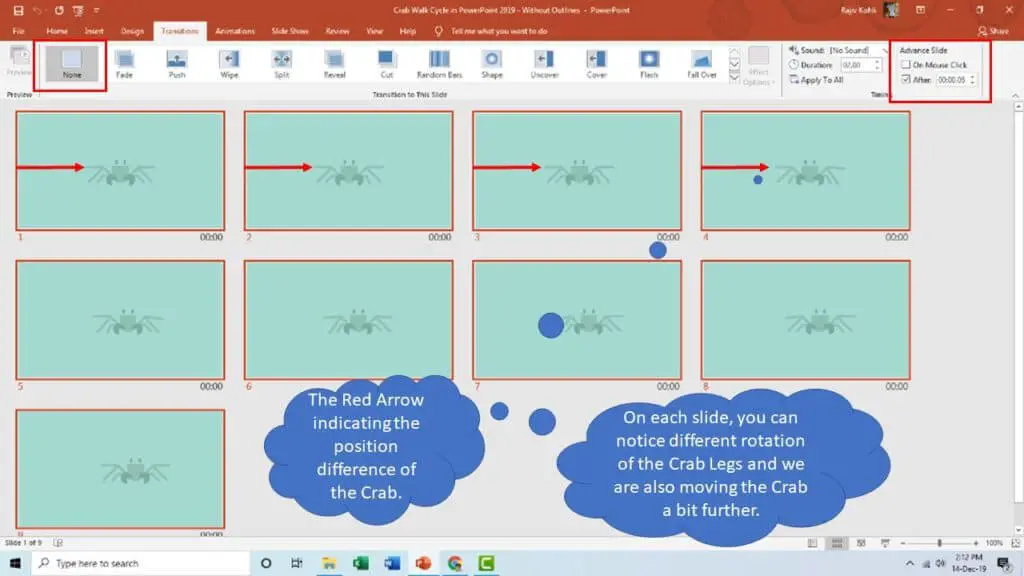
The rest of the process to create the Crab Walk Cycle is easy. Repeat the above steps to create more duplicate slides and then on each slide change the rotation and position of Crab as required as shown in Figure 1.5:
From the Transitions tab, under the Advance Slide; uncheck “On Mouse Click”, and also make a check mark on After, and set a duration of 0.05 seconds for each of the slides. You can move the crab a little bit further on each slide so when you will see the slideshow; not only the Crab will move its legs but will also move a bit forward.
The Red Arrows in Figure 1.5 indicate a position change on the 2nd, 3rd, and 4th slide i.e. 10 Points on the 2nd slide; 20 Points on the 3rd Slide; 30 Points on the 4th Slide, and so on, and by Points I mean; selecting the entire Crab on the 2nd slide and then pressing Right Arrow Key 10 times to move it 10 Points further.
However, this technique of animating a character by placing different poses on different slides is not effective but can help you to create animated scenes in PowerPoint easily if you can place more objects with different poses on the same slides.
You can also read our article on BlackSmith Head Turn Animation, in which we also used the same technique of Advancing To the Next Slide in a given time period to create a short animated scene where at least 2 objects will be in motion.

I hope you got The Teacher Point!
Watch Crab Walk Cycle Animation in PowerPoint Tutorial
You can create this Crab Walk Cycle Animation in the following versions:
- PowerPoint 2007
- PowerPoint 2010
- PowerPoint 2013
- PowerPoint 2016
- PowerPoint 2019


