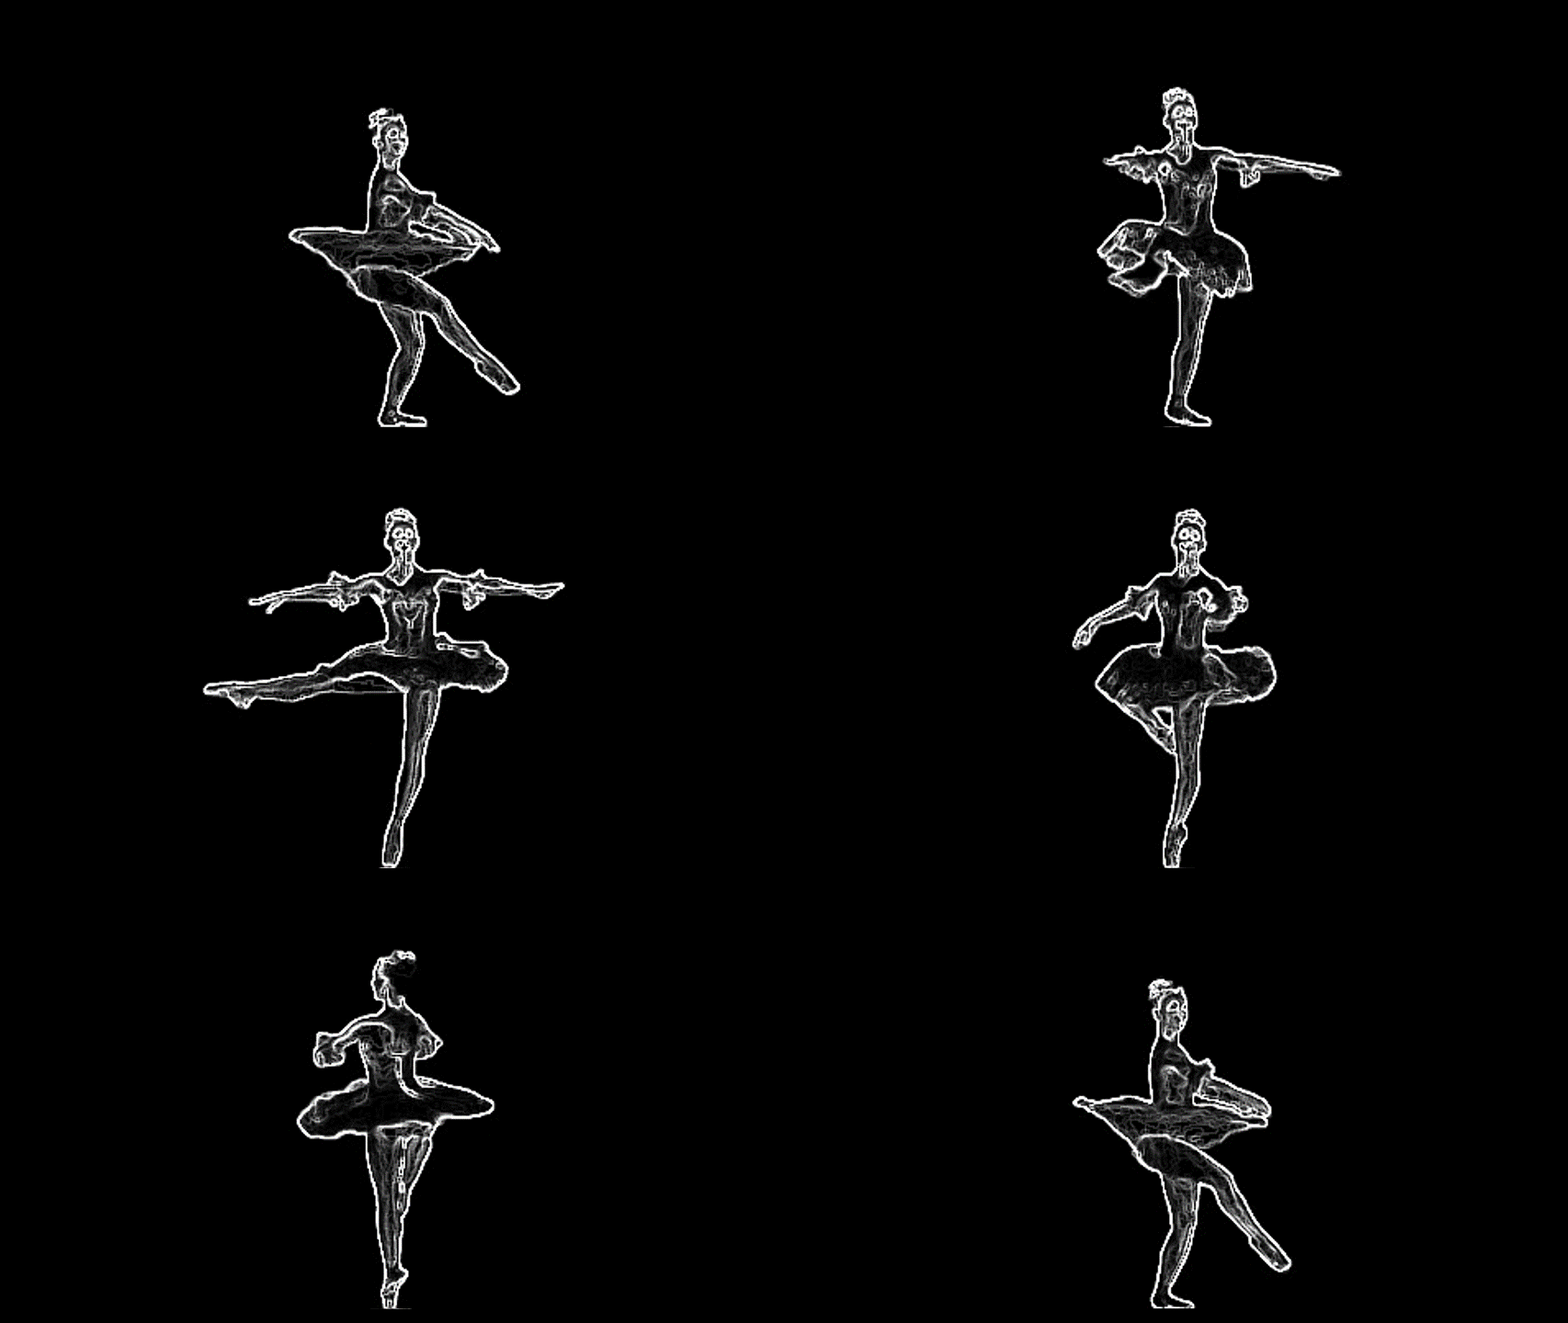
Are you ready to add some pizzazz to your PowerPoint presentations? Imagine having a dancing character come to life right on your slides. In this tutorial, we’ll guide you through the process of creating a dancer animation in PowerPoint using a single PNG image. This fantastic effect will captivate your audience and leave a lasting impression. Let’s get started!
Gather Your Resources
Before we begin, make sure you have the following:
- A dancer PNG image with multiple frames (We used Cesinia the Dwarnik’s work for inspiration).
- A web browser for downloading the image.
- PowerPoint (we recommend using the latest version for the best results).
Step 1: Save the Dancer PNG
- Open your web browser and navigate to the JavaScript code article mentioned in the tutorial. https://www.imgonline.com.ua/eng/cut-photo-into-pieces.php
- Find the link to the dancer PNG image, and click and drag it to a new tab.
- Right-click on the image and select “Save image” with the name “dancer.”
(Insert screenshot here)
Step 2: Divide the Picture
- Search for “crow picture in segments” or “crow picture in equal parts” on Google.
- Click on the “imgonline.com.ua” website to divide pictures.
- Choose the “dancer” image you saved on your desktop as the file to divide.
- Select to divide it into 29 equal parts horizontally and make them square if desired.
- Adjust trimming options and choose your preferred output format (JPEG or PNG).
- Click “OK” to start the process.
(Insert screenshot here)
Step 3: Download the Frames
- The website will create 29 separate images by cropping the dancer into equal parts.
- You can open each link individually by right-clicking and selecting “Open in a new tab.”
- Alternatively, you will receive a zip file containing all 29 frames for convenience.
- Download the zip file and extract it to get the folder with the 29 poses.
(Insert screenshot here)
Step 4: Prepare PowerPoint
- Open PowerPoint and create a new blank presentation with a blank layout.
- Go to the “Insert” tab and click on the “Pictures” drop-down button. Select “Device.”
- Navigate to the folder where you extracted the images and choose all 29 frames. Click “Insert” to add them to the first slide.
(Insert screenshot here)
Step 5: Adjust the Images
- Adjust the size of the images. We recommend setting them to around 5.5 inches.
- Go to the “Align” drop-down button and choose “Align to Slide.”
- Select “Align Center” and “Align Middle” to center all the pictures on the slide.
- You can also fill the background with a black color to eliminate any white space.
(Insert screenshot here)
Step 6: Create Individual Slides
- Your first slide now contains all 29 pictures stacked on top of each other.
- To create individual slides for each picture, right-click on the slide thumbnail view and choose “Duplicate Slide.”
- Delete the top image on the second slide.
- Repeat this process for all 29 slides, duplicating each one and deleting the top image.
(Insert screenshot here)
Step 7: Add Animation
- You now have 29 slides, each with a different dancing pose.
- To create an animation, select the first slide, hold down the Shift key, and select the last slide.
- Go to the “Transitions” tab and under the Timing section, uncheck “On Mouse Click” and check “After.”
- Specify the duration, such as 0.10 seconds, for each slide. This determines how fast the animation will play.
(Insert screenshot here)
Step 8: Customize Animation Speed
- You can adjust the animation speed by selecting all the slides and reducing the duration further, for example, to 0.05 seconds. This is entirely customizable to your preference.
(Insert screenshot here)
Step 9: Loop the Animation
- If you want the animation to continuously loop, go to the “Slideshow” tab, click “Setup Slideshow,” and check “Loop continuously until Esc.” Now, your animation will loop endlessly.
(Insert screenshot here)
Step 10: Save as a GIF
- To save the animation as a GIF, go to the “File” menu, click “Export,” and select “Create an Animated GIF.”
- Adjust the quality and size settings according to your preferences.
- Create the GIF and save it to your desired location.
(Insert screenshot here)
That’s It!
Congratulations! You’ve successfully created an animated dancer in PowerPoint. Your presentations are now ready to dance and dazzle your audience. If you found this tutorial helpful, please consider liking, sharing, and commenting on this blog post. Don’t forget to subscribe to our channel for more upcoming tutorials. Thank you for watching, and take care!
Download Dancer Animation PowerPoint PPT
PPT Info.
PowerPoint Template
Dancer Animation
File Type: PPT / PPTX
File Size: 355KB
Number of Slides: 29
Animated Scenes: 1 (29 Poses)
Download DANCER ANIMATION in PowerPoint
DON’T FORGET TO LEAVE A RESPONSE.


