This PowerPoint Tutorial is about creating a Responsive Head Rigging Animation using Morph Transition and Action Buttons. When I used to teach at a computer institution, I often gave examples to students of how they can use Action Buttons to perform certain tasks in Microsoft PowerPoint.
A list of those tasks can be seen when you click the Insert tab – followed by Action.
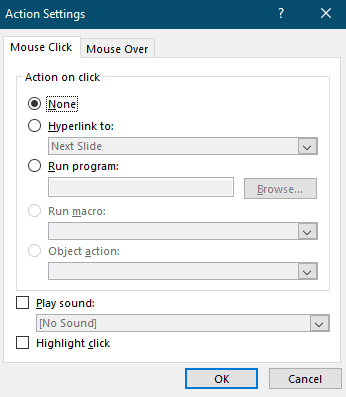
Action Settings are set to None for both Mouse Click and Mouse Over, by default.
Selecting “Hyperlink to” gives you further options in the drop-down menu, where six of them are to “Move” the SlideShow to a particular slide and one is to run Custom Shows. Then you have an option to open a particular web address (URL), and another is to open some other PowerPoint Presentations. The last one is for opening any other document, which supports “All Files” types but that doesn’t mean that those files will start running inside your slideshow. PowerPoint will just open the file throughout the slideshow but in the same application, the file belongs to.
Animation Inspiration
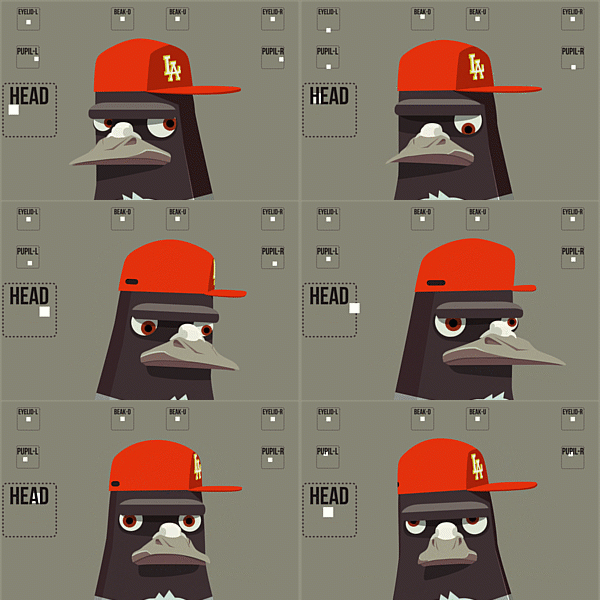
The animation and graphics design inspiration is from
A Pen By Marjo Sobrecaray
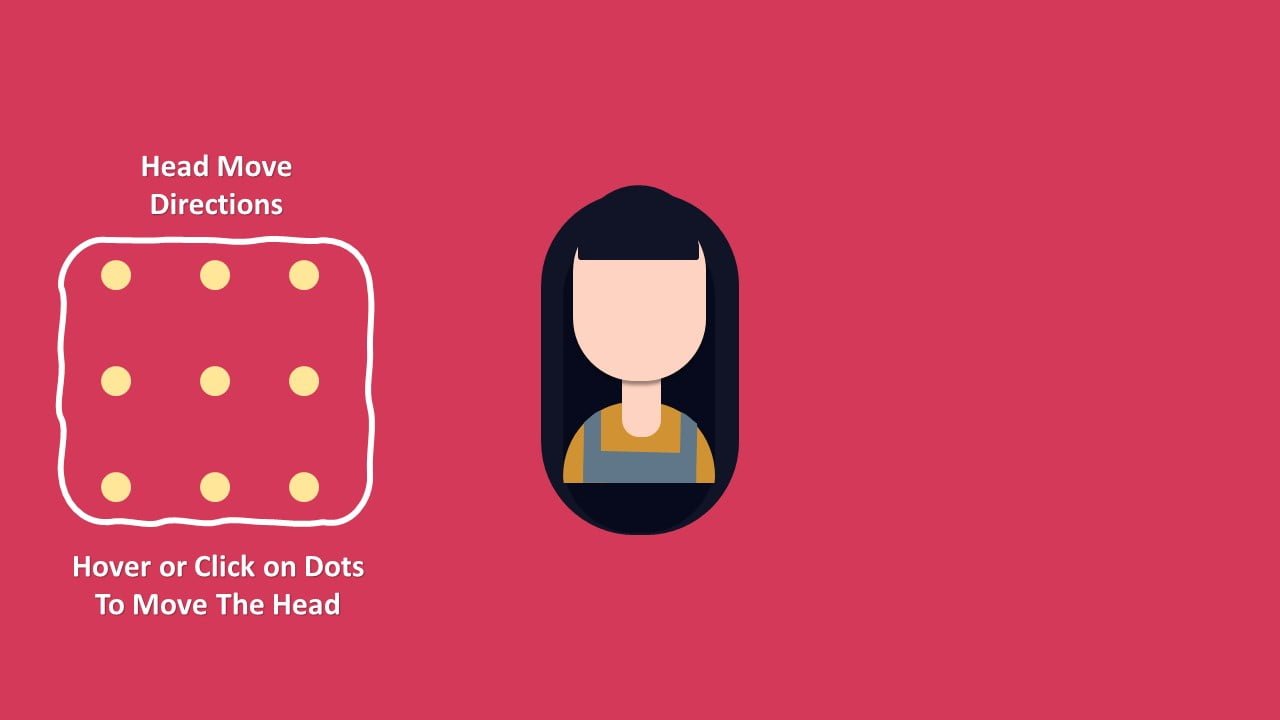
So after seeing the original animation; an immediate idea sparked in my mind to create a similar effect using PowerPoint. For that movement, I thought of using Action Buttons to create the Mouse Hovering / Clicking effect (when hovered over a particular Oval / Dot shape or even on a blank area of the slide). To move the particular parts of the dummy girl, I was thinking of using Morph Transition and interestingly no animation effects have been used on any of the slides but only the Morph transition with Action Buttons. Of course, you can use this technique to create some more complex animations or maybe even a short responsive Game in PowerPoint!
A Shot by Matthew Jedrzejewski at Dribbble
Another great illustration that how the shapes should move and if you are curious enough to try new animation tricks in PowerPoint then you can also think of making the following animation using Motion Paths.
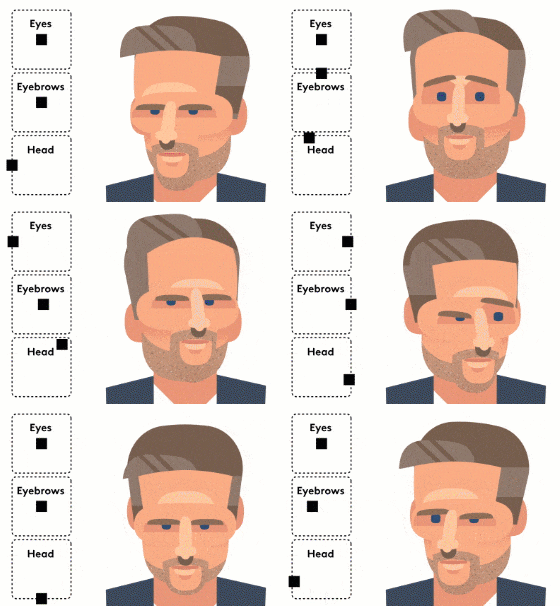
A great explanation that how many separate Shape layers you need to draw in PowerPoint.
Setting Up The Stage
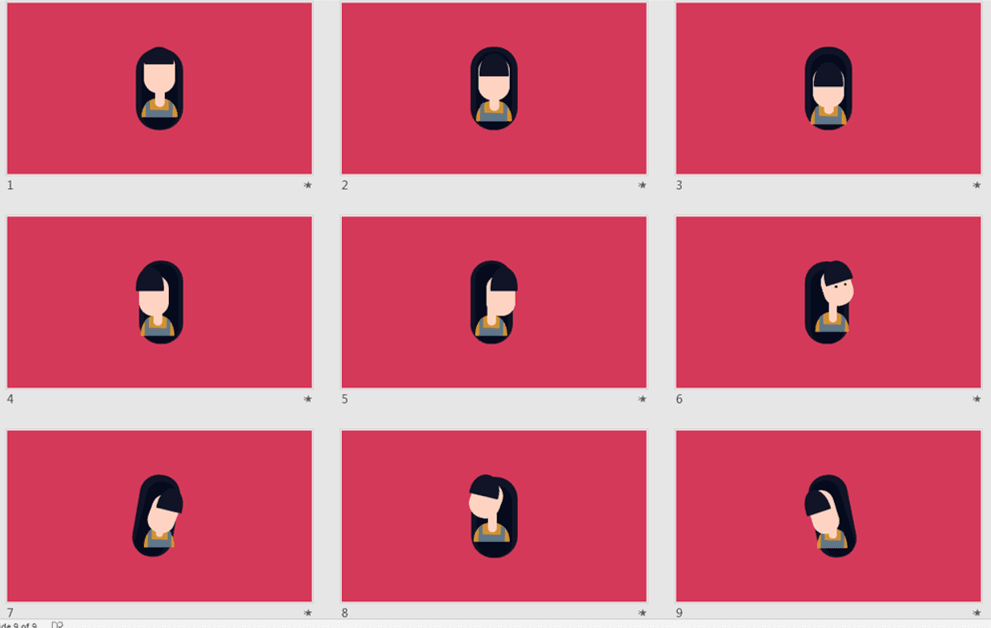
A total of nine slides have been used in our presentation, where 8 of them are duplicates of the first slide and that is the first slide where you need to draw the dummy girl character with Oval Shapes for Moving Directions. You can watch How To Use Shapes / Drawing Tools in the Microsoft PowerPoint Video Tutorial series for more information on Graphics Design.
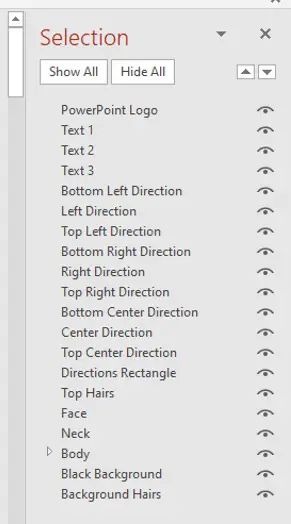
From the Home tab – click the Select drop-down button and open the Selection Pane to see the list of shapes used to draw the character.
9 are Oval shapes for directions and the dummy girl character has been designed with 6 different shape layers like Top Hairs, Face, Neck, Body, Black Background behind the head, and then Background Hairs.
“Shapes having motions in an Animation; must be drawn separately in PowerPoint”
The idea behind this animation is simple. Draw a character having separate shape layers for the body parts which will move during the slideshow on the first slide.

illustrating Shapes used.
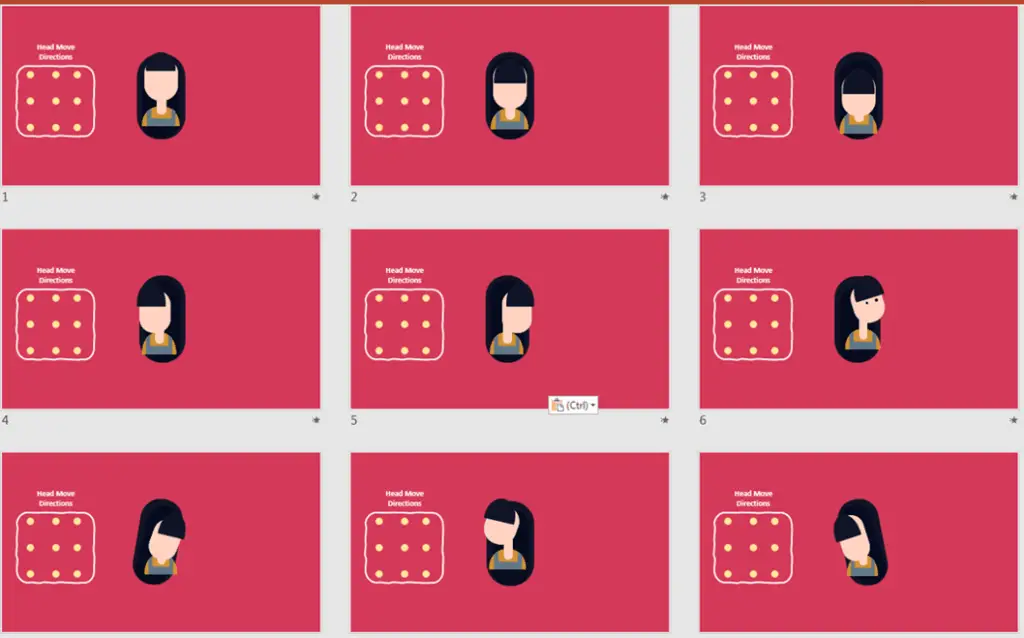
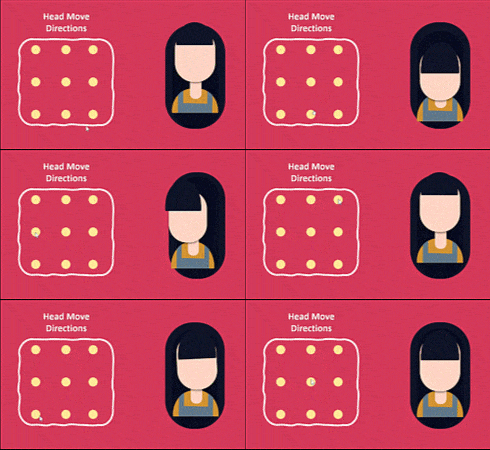
Now, Duplicate the first slide and change the position of the Head on the second slide and repeat the same steps to create 8 more duplicates of the first slide; having a total of 9 different Head positions of the character on 9 different slides; as shown in Figure 1.3.
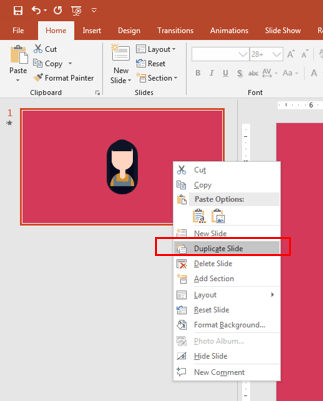
To duplicate slides, expand the Thumbnail view and then right-click on the slide, and then choose Duplicate from the context menu.
Once you have 9 different slides with 9 different Head positions (as shown in Figure 1.3) then draw the Oval Shapes on the first slide and apply the Action Settings to each of the Oval Shapes to move to a particular slide when Mouse Clicked or Hover.

Here is Tip! You can create larger oval shapes around the character and apply the Action Settings and then use No Fill and No Outline from Format Tab to hide those shapes. That way, when a user will Hover or Click around the character then it will start animating but the user will have no clue that how it is happening.
Just a thought!
How To Apply Action Settings in PowerPoint
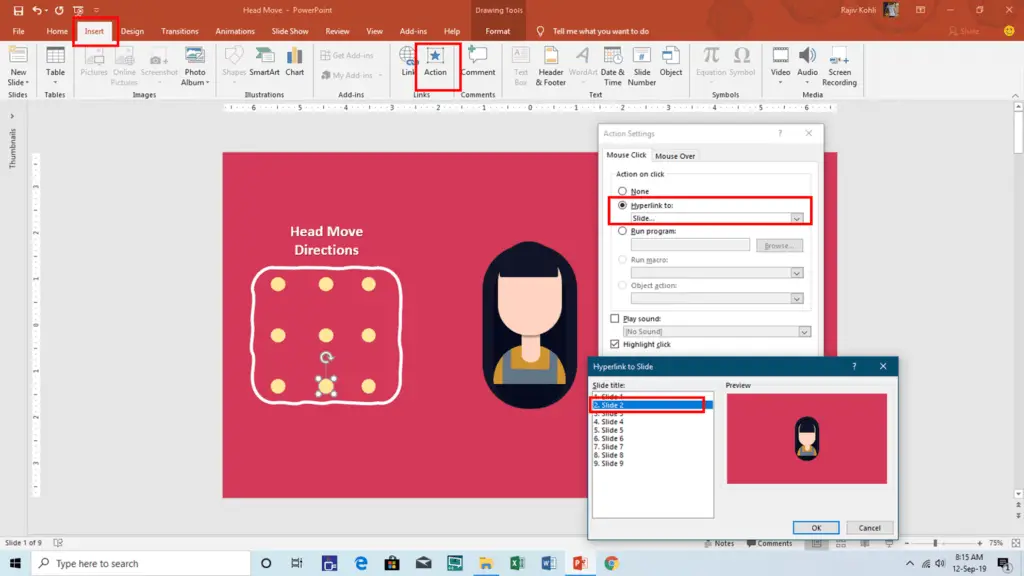
So after completing the graphics design process on the very first slide where you have drawn the character with Oval shapes, then select one of the Oval and apply the Action Settings from Actions in the Insert tab as shown in Figure 1.1 and Figure 1.2.
Select “Hyperlink to” and choose the desired slide you want to show during the slideshow. Let’s say, you select the Bottom – Center Oval shape from the slide and want to move the slideshow to slide number 2 when you hover or click that Oval shape. Choose “Slide” from the “Hyperlink To” drop-down list. Choose the desired slide and hit OK to apply the changes. You can also make a checkmark on Highlight Click or Highlight When Mouse Over; depending on the Actions you will choose. You can also apply both settings; Mouse Click and Mouse Hover; to an object in the presentation. See Figure 1.5.
You need to repeat the above steps for each of the Oval shapes and set Action Settings on each directional oval shape according to the slide number where the direction of the character Head is according to the selected shape.
Like, if you are selecting the Top Right Oval Shape and if that Character Head position has been set on the 7th Slide then you should link Slide No. 7 to the Top Right Dot shape.
Finally, copy all the Oval Shapes from the first slide to the rest of the slides. That way, you don’t have to assign the Action Settings for Oval Shapes on each slide. When you will copy Oval Shapes from the first slide then Action Settings will also get copied.
Morph Transition in PowerPoint – The Magician
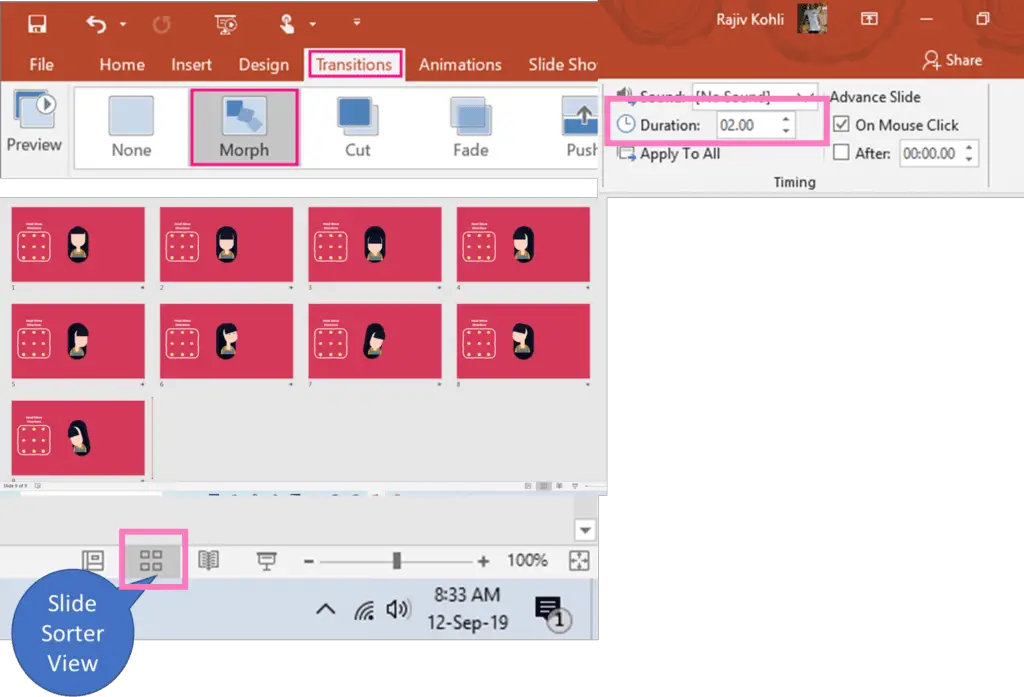
Finally, apply the Morph Transition from the Transition tab to all the slides with the desired Duration timings you want for the head to move when hovering or clicking over an oval shape. You can either apply the Morph Transition to each slide individually or you can Select All (CTRL+A) the slides using the Slide Sorter view.
Before, you start seeing the Slide Show; make sure to make a checkmark on the “Loop continuously until the ‘Esc’ option from the Slide Show tab by clicking on “Set Up Slide Show”, so the presentation will make a loop between the 9 slides and when you will hover or click on an oval shape then it will continue to move between the slides until ESC key is pressed.
I hope you got The Teacher Point.
Watch How To Make Head Rigging Animation Using Morph Transition
The article How To Make Head Rigging Animation using Action Buttons and Morph Transition also applies to the following versions:
- PowerPoint 2013
- PowerPoint 2016
- PowerPoint 2019
- Office 365
Download Head Rigging Animation PowerPoint Presentation (PPT)
PPT Info
PowerPoint Presentation
File Type: PPT / PPTX
File Size: 90KB
Number of Slides: 13
Head Rigging Animation
Animated Scenes: 1

