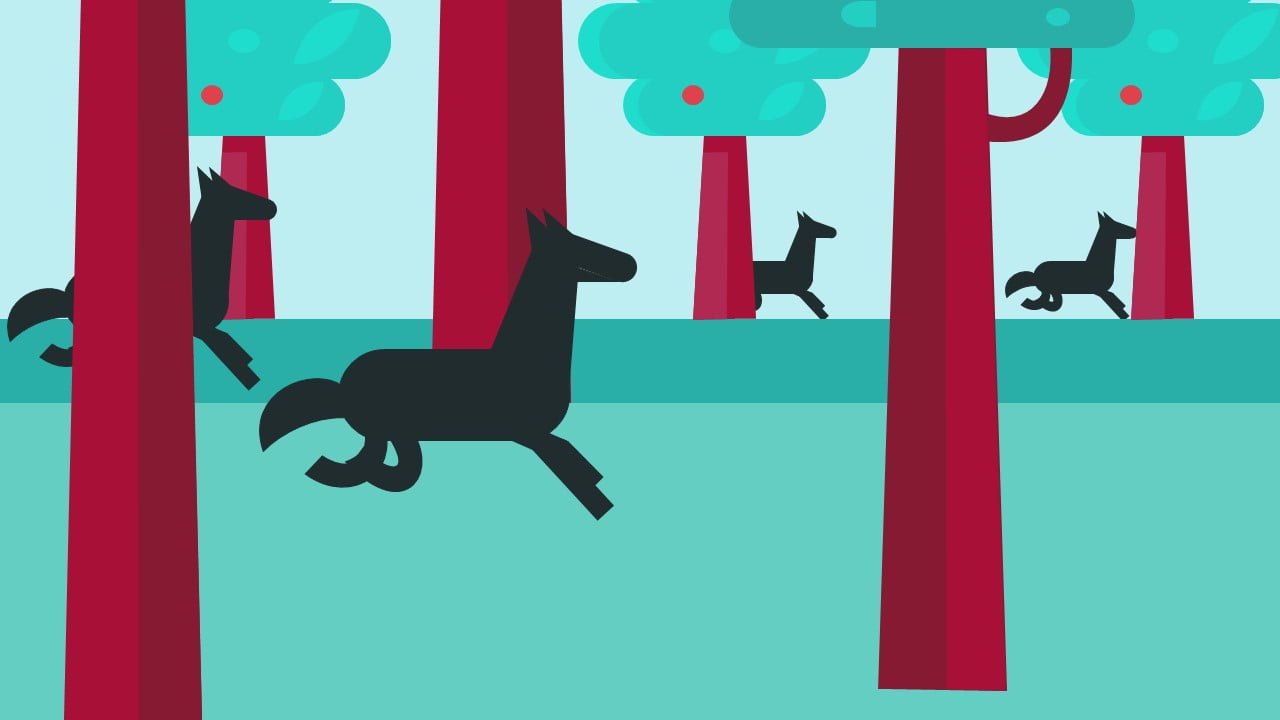
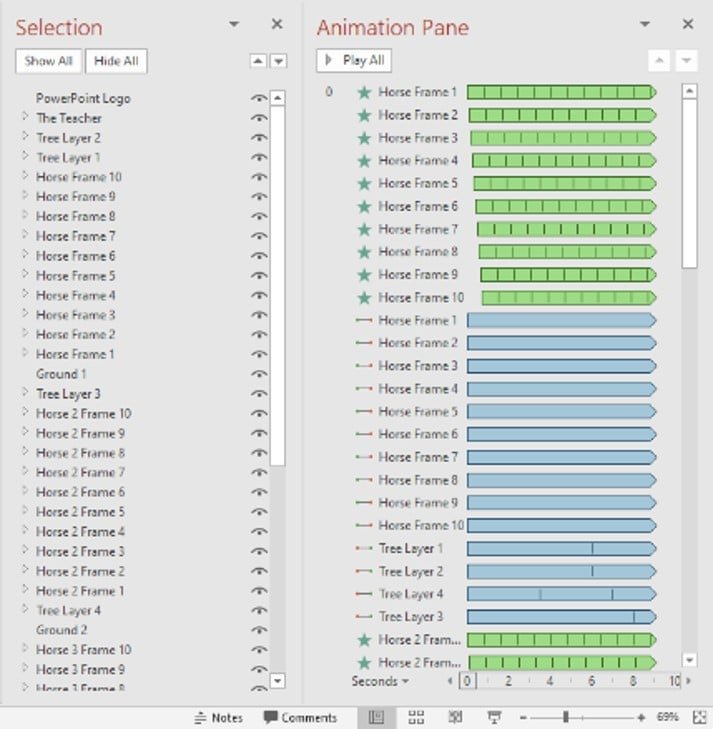
Looking into this huge Objects and Animations list in Figure 1.1, you might want to try your hands on some other animations than making this Horse Walk Cycle Animation using PowerPoint 2016 / 2019.
Let me make things simple for you by explaining the shape layers and animation properties first.
Credits: Trees Graphics Design inspired by Feitosa and the Horse Design animation inspired by Steve Kirby.
Tree Vector Design
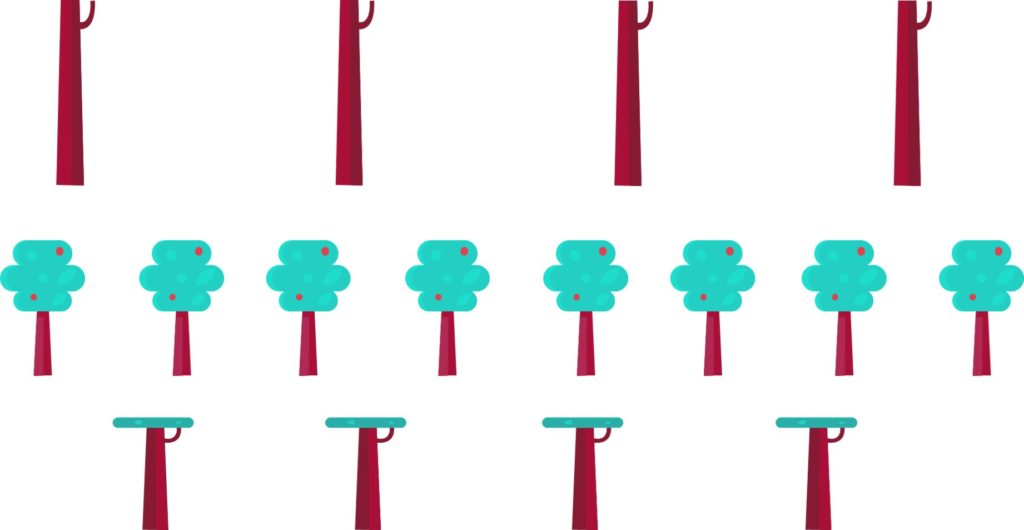
- You basically need to draw 3 different types of trees or even you can download vector graphic images having a transparent background from websites like Freepik. Once you have these shapes then you can make more duplicates of the same and then make a group of them (See Figure 1.2).
After placing the tree layers on the slide, we applied the Left Motion Paths to them and you must take care of the length of the Motion Paths. As we are looping the tree movements Until End of the Slide, so the ending position of the Motion Path must match exactly with the objects on the slide to create a perfect loop without any glitches. As no screenshots can be shown for the Motion Path Length and exact position on the slide, you can download the presentation from the link below and check for yourself or watch our video tutorial.
- Tree Layer 1 and 2 Animation Properties: Left Motion Path, Duration 6 Seconds, No Smoothness and Repeat Until End of Slide.
- Tree Layer 3 is moving at a different time duration of 8 seconds.
- Tree Layer 4 has 3.50 seconds duration.
- Horse Layers are having 2 animations Flash Once and Right Motion Path.
You can watch our How To Create Landscape Parallax Animation Tutorial to learn more about applying different Motion Paths and Time Duration to create these kinds of effects.
Concept of Horse Walk Animation and Design
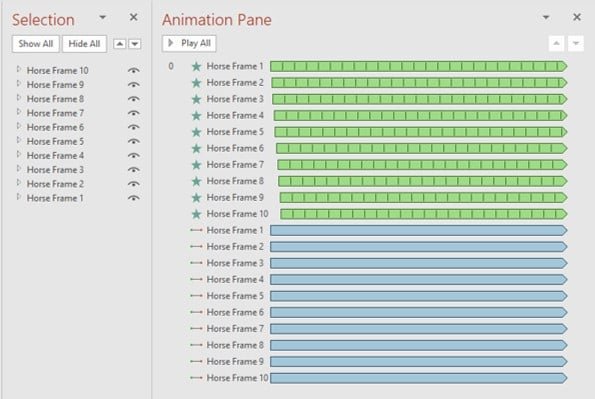
Now, let’s talk about Horse animation. 10 different layers have been used each having a different horse running pose. We applied the Flash Once animation effect on each of the horse layers having the same duration of 0.80 seconds and delay timings of 0.08 seconds between the 1st and 2nd pose and 0.16 seconds delay between the 2nd and 3rd pose and so on.

Figure 1.3
If you are using a later version than PowerPoint 2007 then you need to read this article that How To Get Flash Once Animation Effect in PowerPoint 2010 / 2013 / 2016 and 2019.
The Horse Frames are in Descending Order but the animations are in Ascending Order. It indicates that Horse Frame 1 is behind all the objects while during the slideshow Frame 1 will get displayed first.
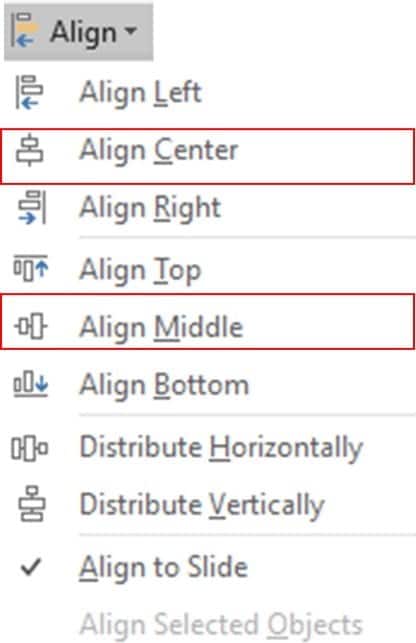
After drawing all the different poses of the horse, you need to place all the frames in one place on the slide. Select all the horse layers and then click on the Align drop-down button from the Format tab. First, choose Align Center followed by Align Middle.
As we have 10 different layers of horse and we need to apply Flash Once and Right Motion Path to each layer, which means a total of 20 animations will be applied. To make this job easy (instead of applying both of these animations individually to each layer), you can apply the Flash Once and Motion Path to one of the horse layers and then use Animation Painter to replicate the same effect to the rest of the layers and finally add the Delay Timings between the Flash Once effect.
I hope you got The Teacher Point.
Watch Horse Walk Cycle PowerPoint Tutorial Video
Tutorial Video Transcript:
Good morning, everyone, and welcome back to our channel, “The Teacher.” This is Rajiv, and today we are going to create a horse walk cycle animation in PowerPoint 2016. But before we dive into this tutorial, let me remind you that if you haven’t watched my previous videos on creating landscape parallel or effects and how to use “Flash Once” animation in PowerPoint 2016, I strongly recommend watching those tutorials first. Practicing those techniques will help you in creating this animation in PowerPoint 2016 or 2019, and you can even apply them to earlier versions of PowerPoint. So, let’s get started.
Before we proceed, I’d like to mention that this animation is inspired by one of the animations by Feitosa at Dribbble.com. The trees in this animation are inspired by Feitosa’s work, and you can see some of his trees on Behance.net. You can also find a similar profile of his work here. As for the horse, it was inspired by an animation from Stevie at Dribbble.com. Now, let’s dive into the tutorial.
Before we begin, I want to show you all the objects I’ve created using the shape tools. To do that, I’ll go to the Home tab and click on the Select dropdown button and choose Selection Pane. Here, you can see a list of all the objects I’ve used. Don’t worry about the extensive list; I’ll walk you through it.
I’ve also applied several animations to this presentation, which I’ll show you by opening the Animation Pane from the Animations tab. You’ll see a list of animations that I’ve applied. First, let’s run the slideshow, and then I’ll explain the objects and animations in more detail.
In the slideshow, you can see that the background trees look similar. I’ve drawn just one tree and then replicated it as many times as needed. I did the same for all the trees. So, we have only three layers in this animation.
For the horses, you’ll notice that I only animated one horse and then replicated it and adjusted the size. So, you don’t need to worry about the many objects and animations in this presentation.
Now, let’s start from the beginning. I’ll select these three layers, make a copy, and paste them into a new slide so that you can examine the animations and objects more closely. I’ll zoom out for a better view.
As you can see, only one tree has been drawn, and then I replicated the same tree to create a group of them. If I open the Animation Pane now, you can see the animations I’ve applied. I used a left motion path with a duration of six seconds, and it repeats itself until the end of the slide.
If I show you the motion path’s length, you’ll notice that it matches the ending position of the object on the slide. This ensures a smooth loop of motion. The duration of the animation is set to six seconds, which aligns with the end of the slide. When you view the slideshow, you’ll see that the tree doesn’t flicker during the loop.
Using the same technique for all the trees here, as you can see, I’ll copy this one and paste it onto the new slide. So, I’ll draw one of the trees and replicate it many times. Then, I’ll apply the same left motion path with a shorter duration. This way, the trees in the foreground will move faster, while those in the background will move at a slower pace. This creates a landscape effect. You can watch my video on how to create a landscape LFX in PowerPoint for more information.
Now, let’s talk about the horse. Here, we have this horse. Let me copy all the layers of this horse and paste them onto a new slide. I’ll delete these briefs and paste it right here. Now, let’s zoom in. We’ve applied two animations to these layers of the horse. As you can see, there are ten motion paths and ten flash animation effects. If I open the selection pane, you can see that for the horse animation, I’m using ten different layers. Let me collapse all of these. PowerPoint doesn’t have an option to expand or collapse all the layers in this selection pane. So, here, I’ll show you the horse. As you can see, these horses have different positions in each frame. So, I’m using ten different frames for one horse to create a lifelike effect.
If I show you the slideshow now, you can see all the ten frames moving to the right. I’ll select one of the horses, go to the shape format tab, click the group dropdown button, and choose ungroup. Let’s zoom in a little bit. Here, you can see all the layers that I’ve used to create a single horse. What I did was use the freeform shape tool to draw this horse, along with the rounded corner rectangle and the 100 rectangle. After creating one of the poses for the horse, for the next pose or next frame, what I did was replicate the same frame by selecting all of them and holding the control and shift keys while dragging and dropping to make a duplicate. Alternatively, you can also press control + D after selecting all the objects to make a replication, or you can use copy and paste. For the next frame, you can select this tail here, go to the shape format tab, click the Edit Shape dropdown button, and then choose Edit Points and then, you can select one of these points and change the shape as you want. I used the same technique to create ten different poses of the same horse, as you can see here. Then, I applied these animations to them. You can watch my tutorial on how to use the “Flash Once” animation in PowerPoint 2016 or 2019. So let me give you a quick overview of how you can use the “Flash Once” animation effect in PowerPoint 2016 or 2019. For that, you need to download my presentation and open it.
After opening my presentation, you can select one of the horses that have the “Flash Once” animation effect. As you can see, I have selected the three last layers, tenth frame, ten. Then, click the Animation Painter once, and then click on the object to which you want to apply the “Flash Once” effect. This way, you can replicate the “Flash Once” animation because it is notably live in the later versions of PowerPoint than 2007. Once you have the “Flash Once” animation effect inside your presentation, you can select your object, click on the Animation Painter, and then click on the next object to which you want to apply the “Flash Once.”
That is how you can have “Flash Once” inside your presentation. Now, I will close this presentation and show you how I applied these “Flash Once” animations to the horses. I will select this one, make a copy, and insert it into a new presentation. I will paste them and change the layout to black.
As you can see, if I open the Animation Pane, there are ten “Flash Once” animations applied to each layer of the horse. If I open this selection pane, you can see that there are ten different layers of the horse and for each one of them, we applied the ‘Flash Once’ animation. Here are the durations and delay timings:
For the duration, I used 0.8 seconds for all frames.
For the delay timing, starting from the second frame, I added 0.8 seconds, and for the third frame, I used 1.6 seconds, for the fourth frame, 2.4 seconds, and so on. I added an additional 0.8 seconds of delay between each frame.
I also applied the ‘Right Motion Path’ to the horses. If you view the slideshow, it will look like this:
Once you have all the layers of an object to which you want to apply the ‘Flash Once’ animation, there’s one important step. Select all these layers, go to the ‘Shape Format’ tab, click the ‘Align’ drop-down button, and choose ‘Align Center’ and ‘Align Middle’ to ensure all layers are in the exact position on the slide. This prevents glitches between animations when they play simultaneously.
After you’ve done this, to create more replicas of this horse and reduce their size, follow these steps:
Select all the layers.
Duplicate them by pressing ‘Ctrl + D.’
Place the duplicates side by side.
While reducing their size, hold down ‘Ctrl + Alt + Shift’ keys. This will reduce the size uniformly from all sides.
Now, let’s take a look at the slideshow. I hope you find this tutorial helpful. Please let us know by liking, sharing, and commenting on this video. Don’t forget to subscribe to our channel for more upcoming tutorial videos. Thanks for watching, and have a great day. [Music]
Suggest 10 Optimized Titles
The article How To Horse Walk Cycle Animation also applies to the following versions:
- PowerPoint 2007
- PowerPoint 2010
- PowerPoint 2013
- PowerPoint 2016
- PowerPoint 2019
Download Horse Walk Cycle Animation PowerPoint Presentation (PPT)
PPT Info
PowerPoint Presentation
File Type: PPT / PPTX
File Size: 450KB
Number of Slides: 1
Horse Walk Cycle Animation
Animated Scenes: 1

