
Introduction to Flash Once Effect Animation
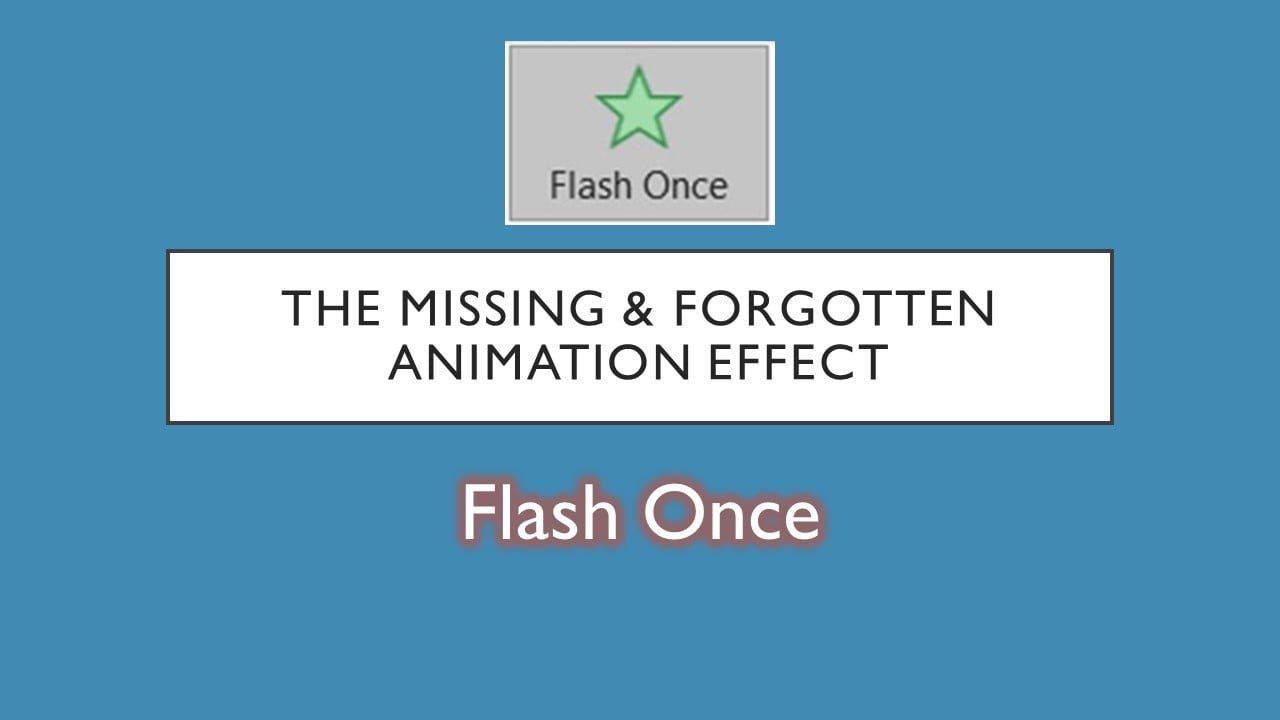
Flash Once is an under-rated animation effect in PowerPoint that even Microsoft removed it from the animation list and it is not available in PowerPoint 2010 / 2013 / 2016 and 2019. Even I never thought of using this effect until the day I found PowerPoint Heaven.
I was really surprised to see their amazing work. Especially their technique of using the Flash Once effect in the presentations to create 2D Flat Animated Short Movies. My eyes were just wide-open and immediately tons of ideas sparked into my mind which helped me to create many animation tutorials on my Youtube Channel.
How Flash Once Effect behaves?
The Flash Once falls under the Entrance animation category in PowerPoint and when you apply this effect to objects like Text Boxes or Pictures then during the slideshow the objects flash on the screen for a very short time according to the Total Duration Timings of the effect.
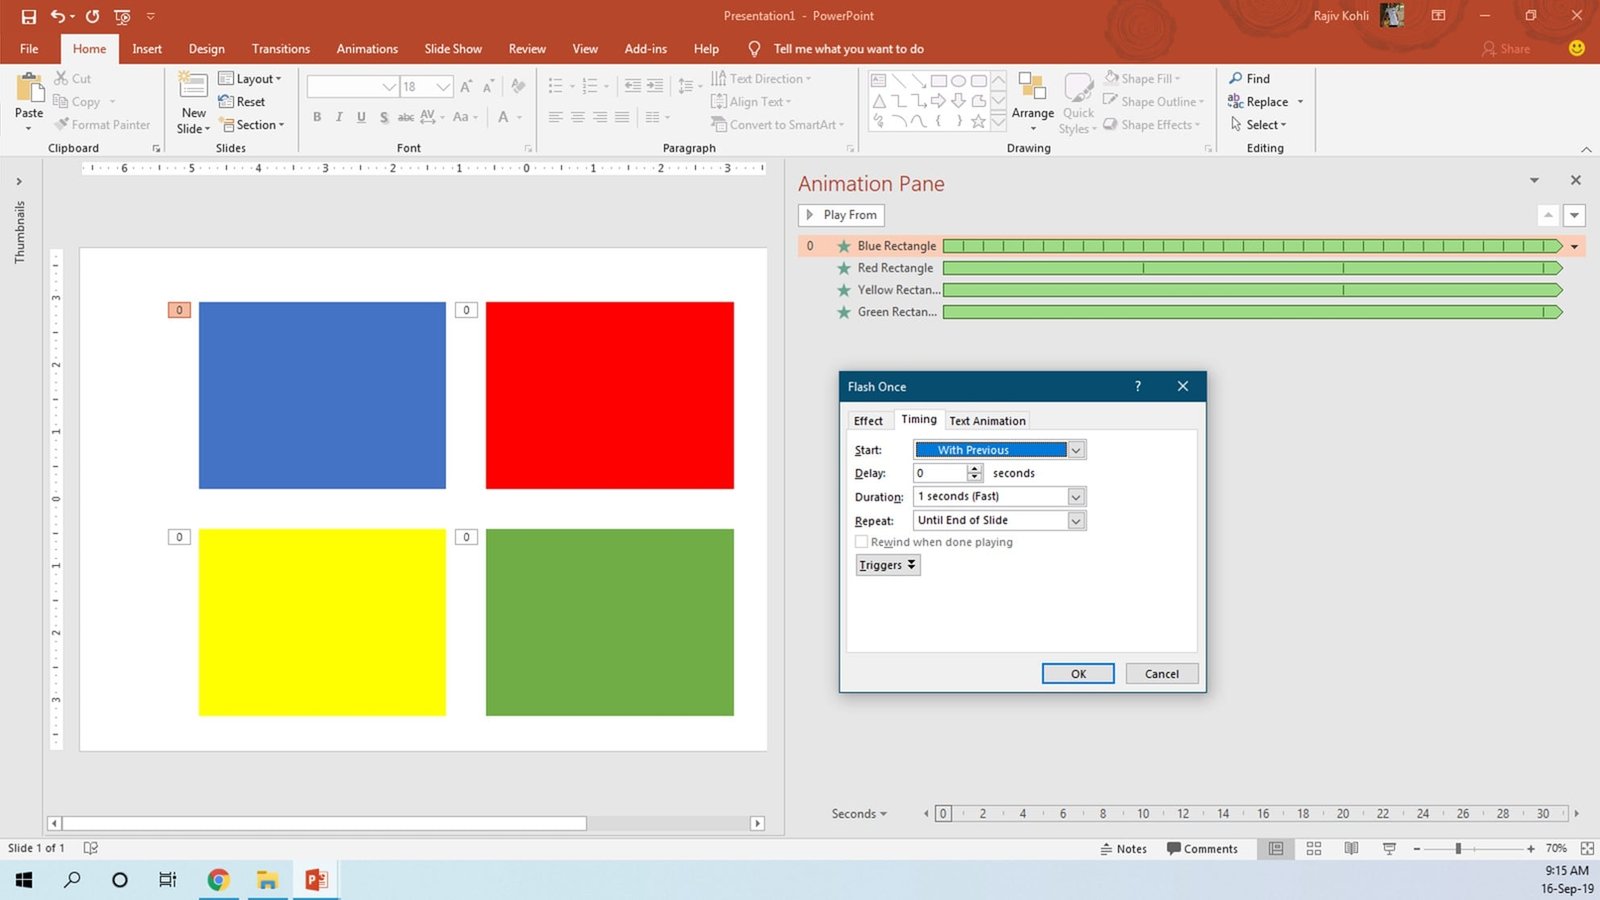
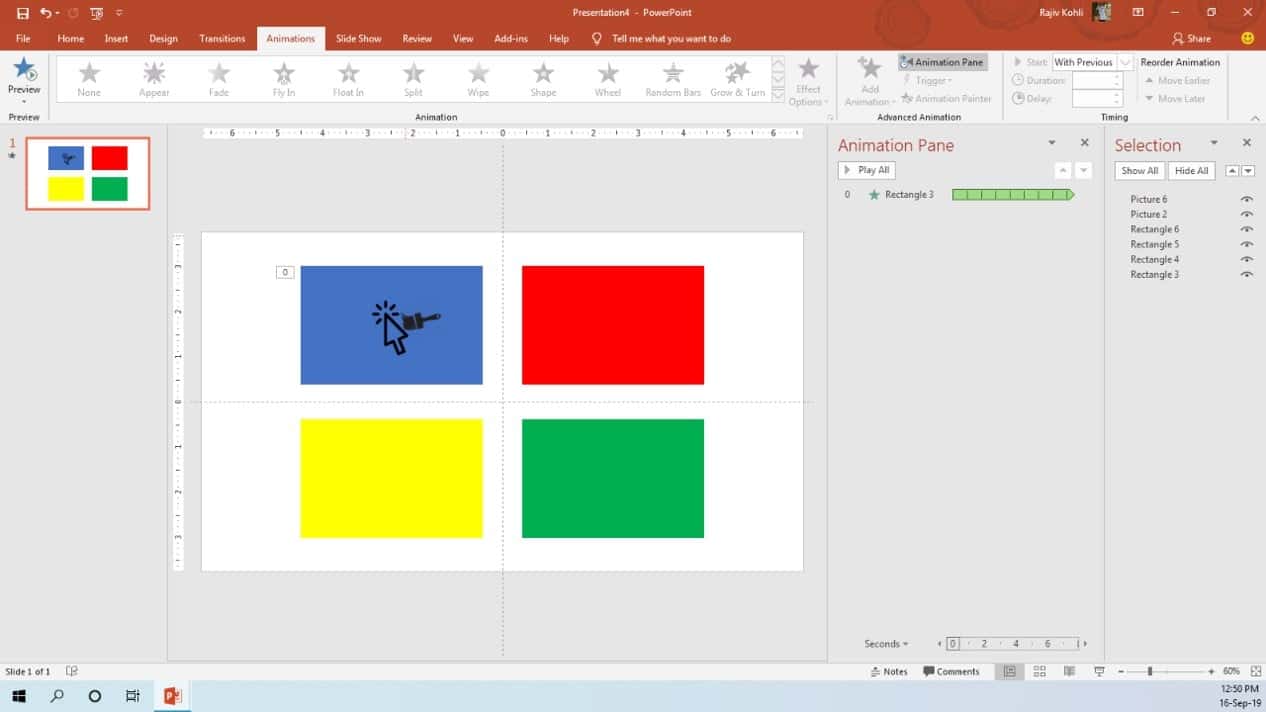
If I am not wrong then the objects stay on the screen for the tenth part of the Total Duration Timings of the Flash Once animation. As an example, draw 4 Rectangles having different Fill Colors on the slide and apply the following Duration Timings to each of the rectangles.
During Slideshow objects stay on-screen during slideshow for the 10th of the Total Duration of the animation.
The Blue Rectangle in the picture above has a total duration timing of 1 second, Red Rectangle has 10 seconds, the Yellow 20 Seconds and Green Rectangle has 30 seconds. We are repeating the effect until the End of the Slide, just to show you the total duration for which the object stays on the screen.
When you will see the Slideshow, the Blue Rectangle will stay on the screen for 0.10 Seconds (10th of 1 Second), the Red Rectangle will stay for 1 Second (10th of 10 Seconds), the Yellow for 2 seconds (10th of 20 Seconds) and Green for 3 Seconds (10th of 30 Seconds duration).
What you can create with Flash Once Effect?
Read our Easy Method of Creating Animated Scene in PowerPoint for more information on applying Flash Once to animate characters inside your presentations.
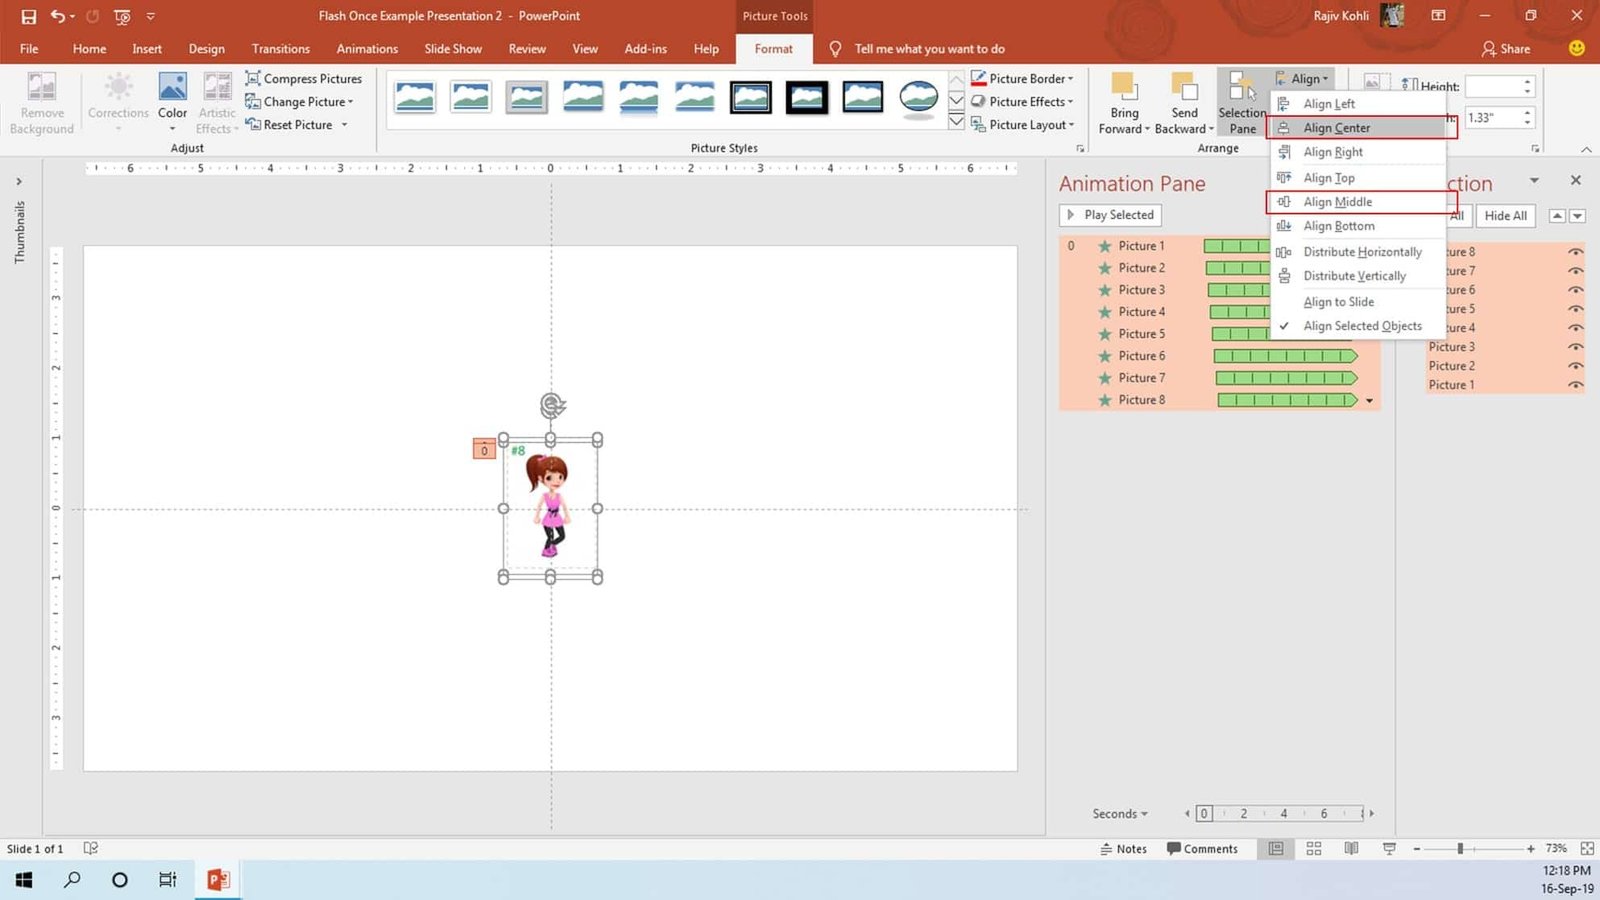
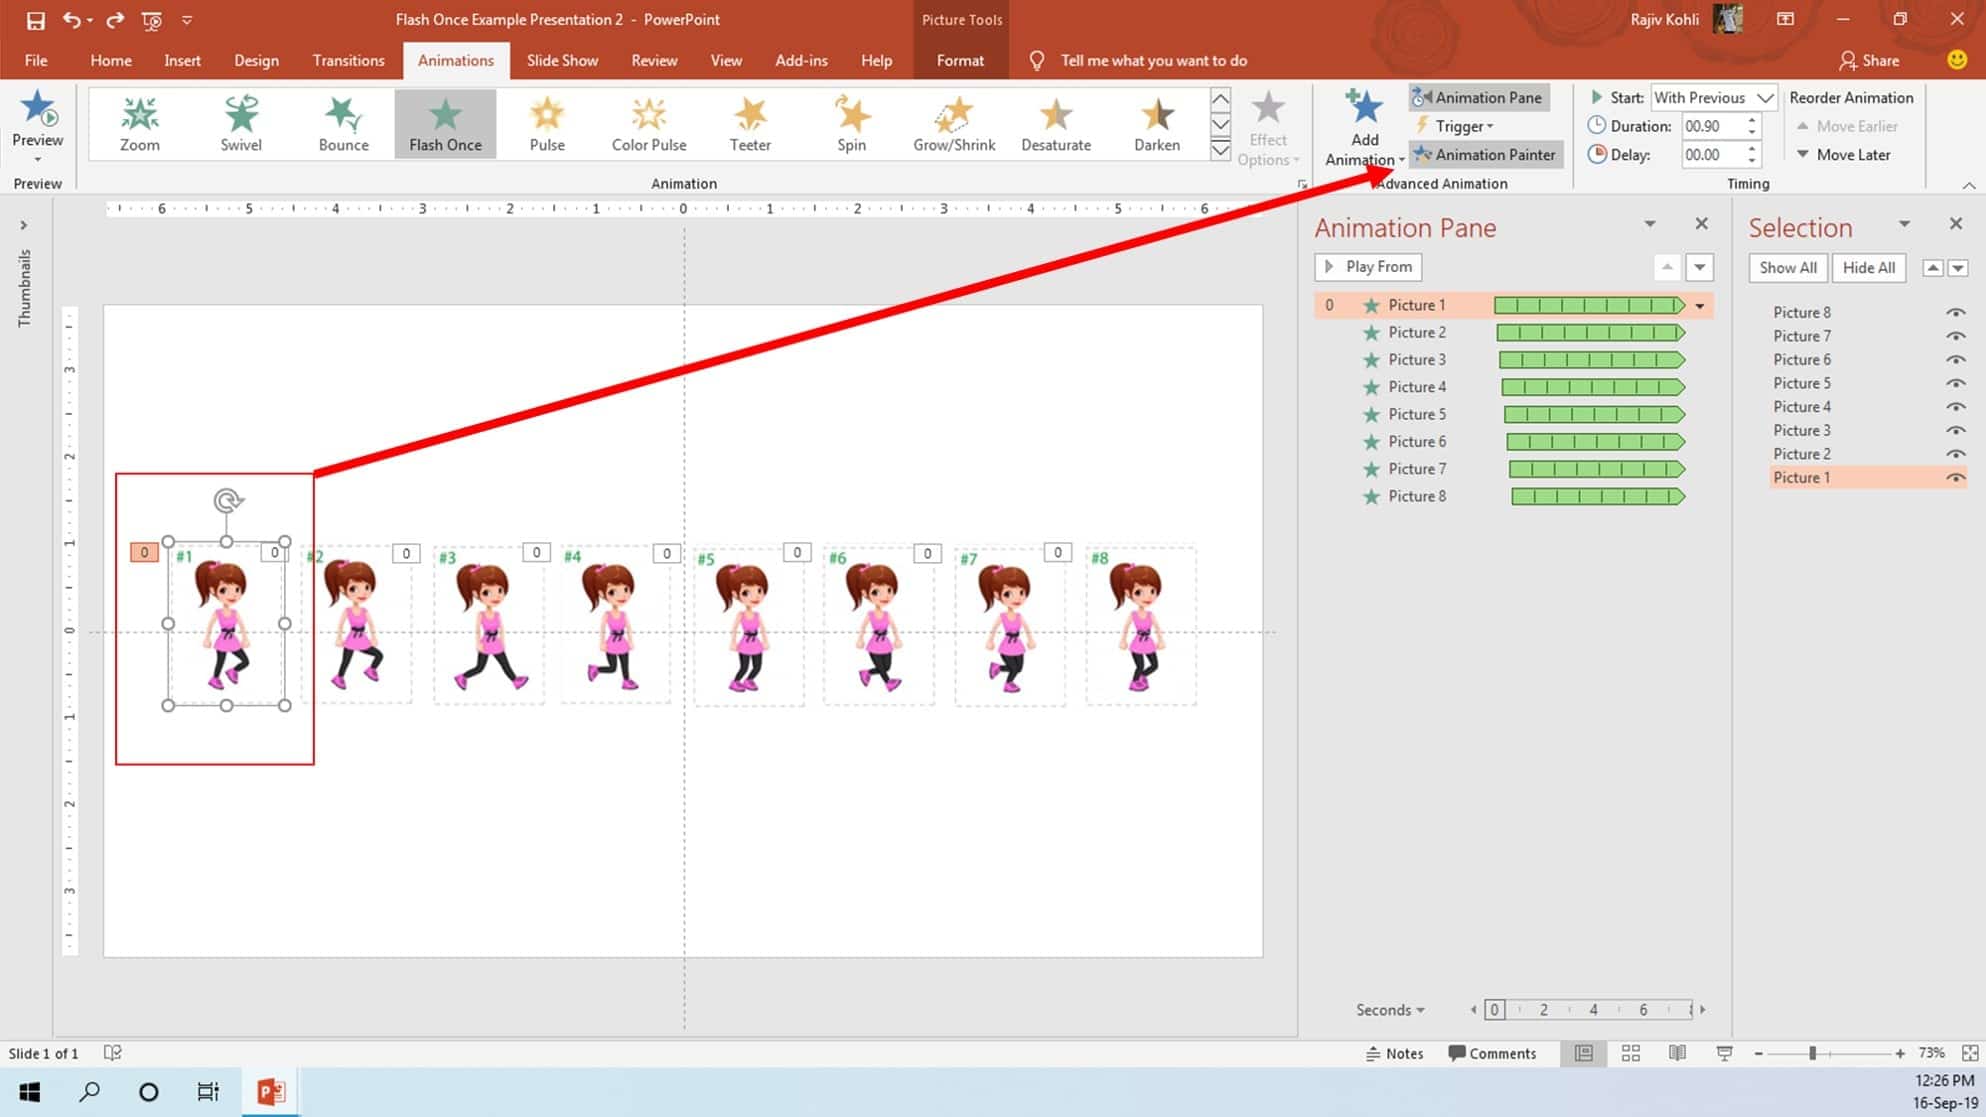
So, let’s say you have 8 pictures of a character having a different walk pose in each frame. Look into the Selection Pane where pictures are in descending order but the animations are in ascending order. That means when the pictures will be aligned on top of each other, Picture 1 will stay behind all of the other pictures but during the slideshow, you will see Picture 1 on top first and then the rest of the pictures according to animation order.
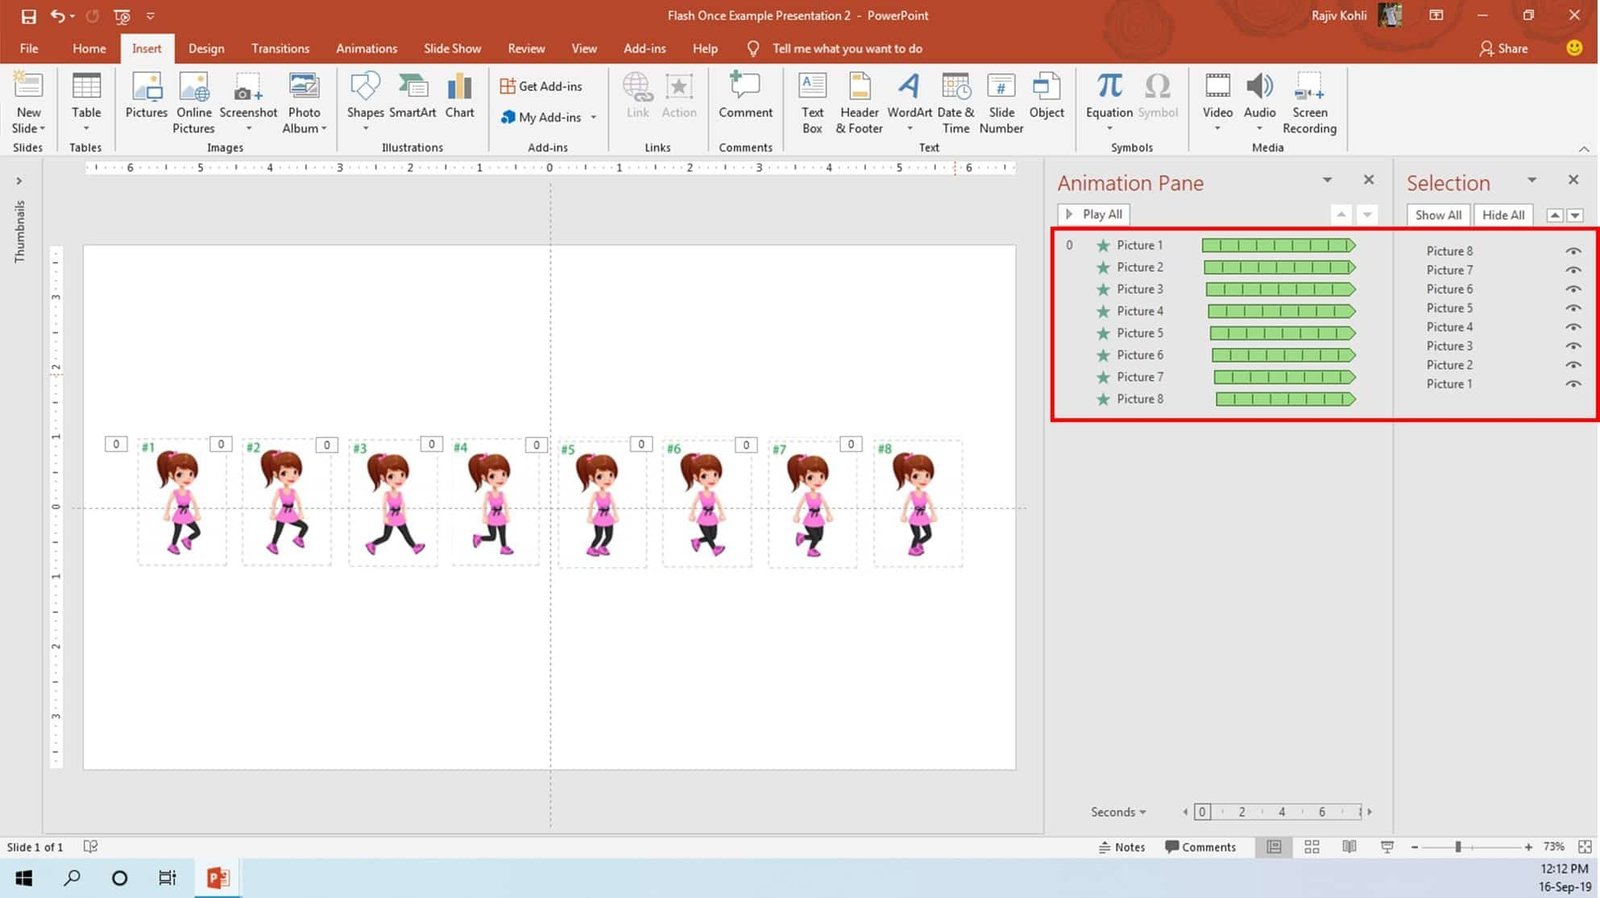
Animations are in Ascending Order and Picture’s Alignment is in Descending Order
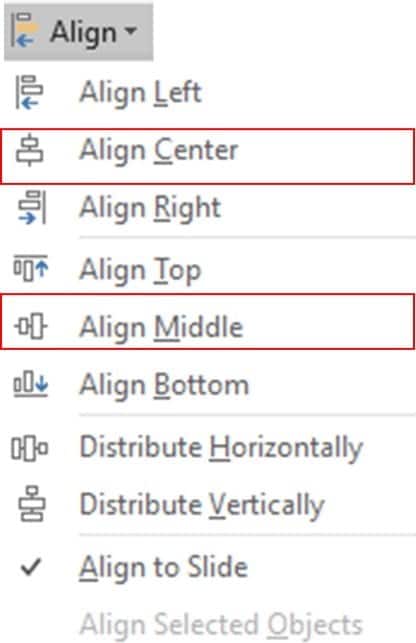
After applying the Flash Once animations to all the pictures, Select All pictures – go to the Format tab, click Align Center, and then again Align Middle to place all the pictures on top of each other in one place.
Proper Cropping / Alignment and Transparent Pictures are preferable
After applying the Flash Once with proper Duration and Delay timings and aligning all the pictures on top of each other, the animation will look like this:

The more frames you have, the better the results will be and the animation will look more realistic. 8 Frames are less as compared to 25 FPS (Frames Per Second) in Animated Movies but still, you can imagine the results. In the example above, we applied 0.90 Seconds Flash Once Duration to all the pictures having 0.10 Seconds Delay Timings between each frame. Like, for the 1st Picture at 0 seconds delay, 2nd at 0.08 seconds, 3rd at 0.16 seconds, and so on.
You can experiment with more frames with different duration and delay timings but the maximum duration timing should be 1-second maximum.
How to Insert Flash Once Effect in PowerPoint?
As said earlier that you will not find this effect in the Entrance animation list in later versions than PowerPoint 2007.
To get this effect in later versions of PowerPoint, you can open a presentation having Flash Once applied on at least one object then use the Animation Painter to copy that effect into any other presentation.
The only way of getting Flash Once in PowerPoint 2010 and later versions.
- For instance, download and open our presentation from the link below. Select one of the pictures from the presentation having Flash Once applied and then click the Animation Painter once.
- Switch back to another presentation and simply click on the object to which you want to apply the Flash Once Effect and you’re done!
Tip: Double-clicking the Animation Painter will lock it and then you can continuously click on objects to apply the Flash Once to as many objects until you press the ESC key to close it.
I hope you got The Teacher Point.
Watch How To Insert Flash Once Effect in PowerPoint Video Tutorial
The article How To Get Flash Once also applies to the following versions:
- PowerPoint 2010
- PowerPoint 2013
- PowerPoint 2016
- PowerPoint 2019