Introduction to Parallax Zoom Effect
- Three different techniques have been used to create this Parallax Zoom Effect or Vertigo Effect in PowerPoint 2016 / 2019 tutorial. You can try the first two methods even in earlier versions of PowerPoint but the Morph Transition has been used in the 3rd presentation, which is only available with Office 365 Subscription.
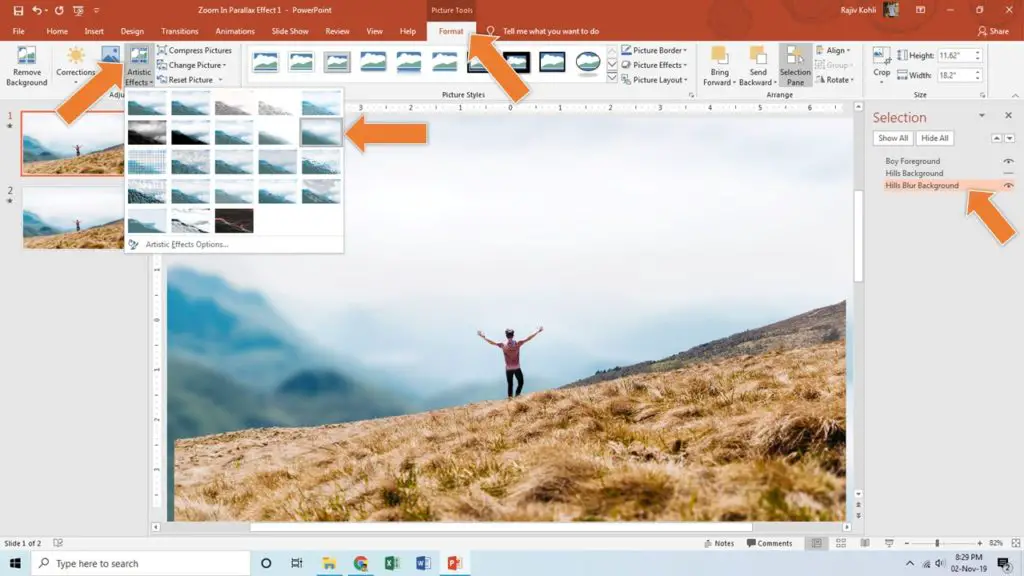
- We are using three different images to create the Parallax Zoom Effect: Boy Foreground.png, Hills Background.jpg, and Hills Background Blur.jpg.
The animation is truly inspired by: https://codemyui.com/zooming-subject-parallax-background/

In the image above, do note down the position of the images, where Boy Foreground.png is on top of the other two images. The image has a transparent background and that is why you can see the Hills Background.jpg image in the background.
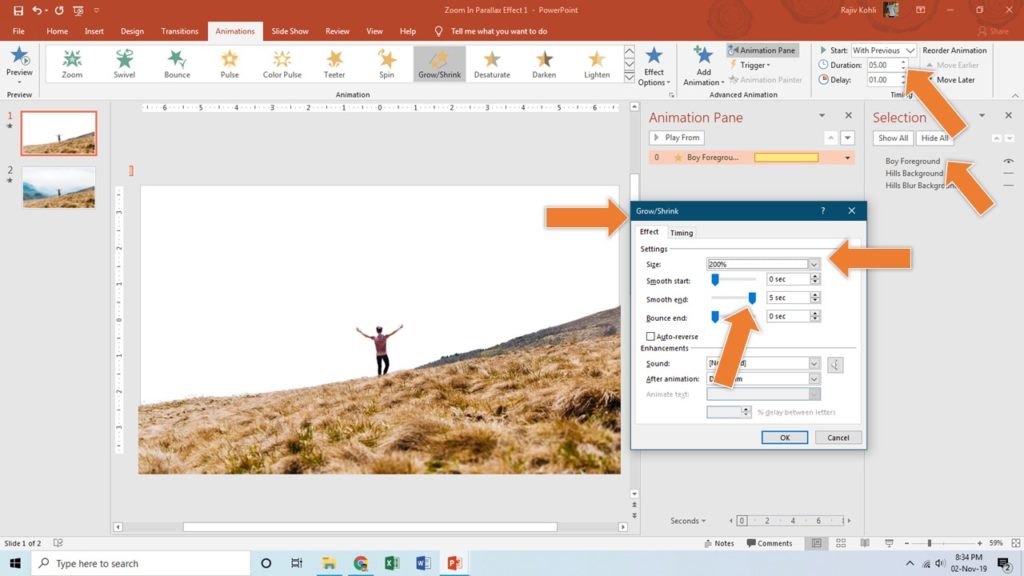
- First, we will apply the Grow/Shrink Emphasis animation effect to the Boy Foreground.png image with a 200% Growth Rate, Duration of 5 Seconds, and End Smoothness of 5 Seconds as shown in Figure 1.1:
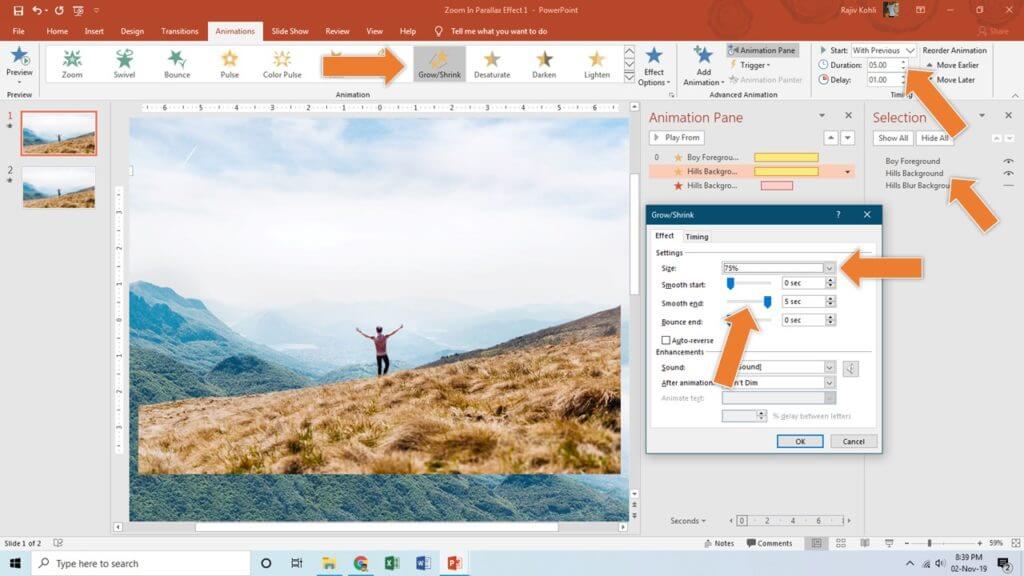
- The next animation effect has been applied to the Hills Background.jpg. Grow/Shrink with 75% Shrink Rate, 5 Seconds Duration, and End Smoothness 5 Seconds. See Figure 1.2:
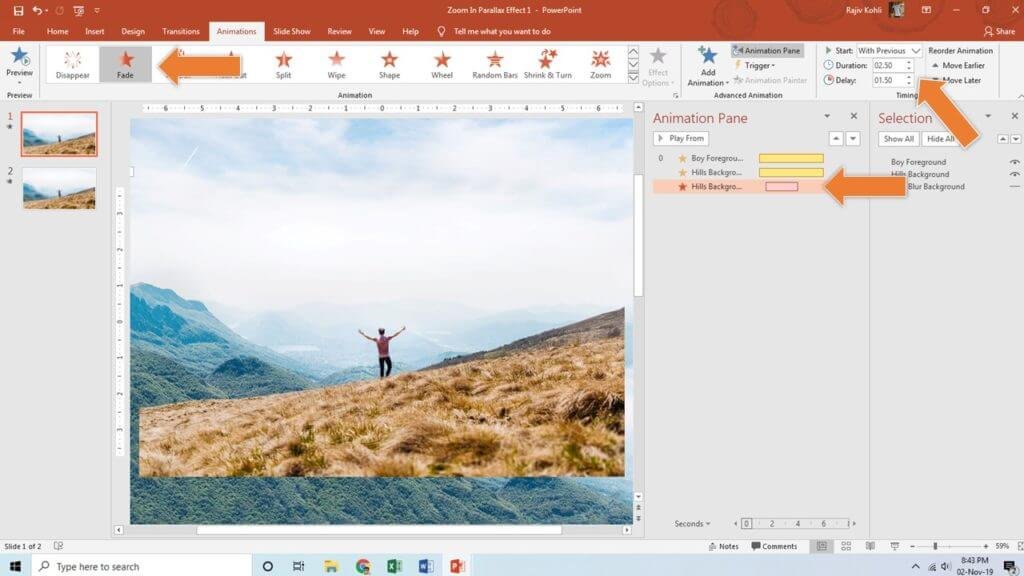
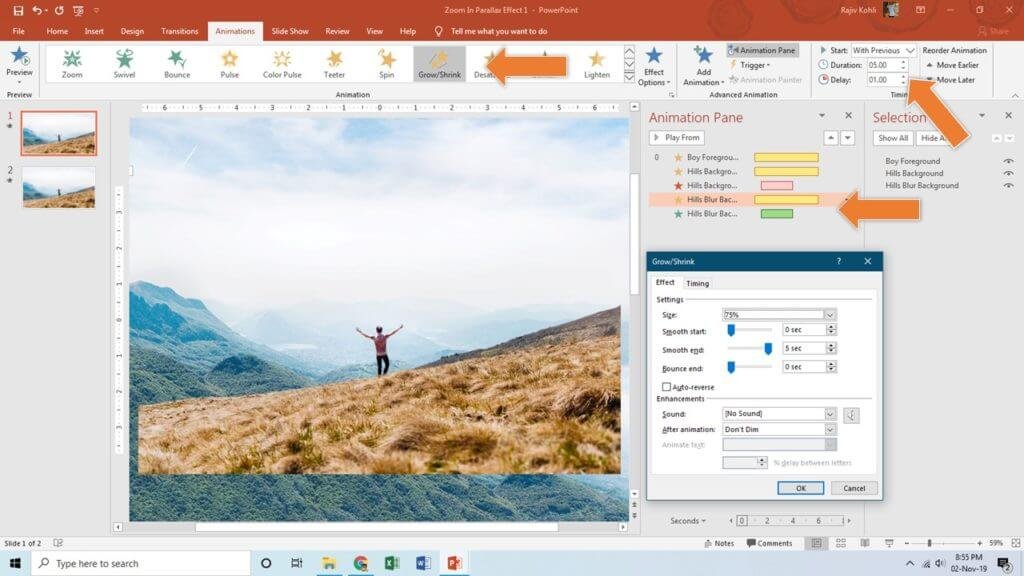
- We also applied a second animation to the Hills Background.jpg, which is the Fade Exit effect with 2.50 Seconds Duration and 1.50 Seconds Delay Timings. After 1.50 Seconds, the Hills Background.jpg image will start Fading Out and will take 2.50 seconds to completely vanish.
- Finally, you need to apply the same Grow/Shrink effect to the Hills Background Blur.jpg along with the Fade In Entrance effect both having the same animation properties as the Hills Background.jpg has and our first slide is ready having the Parallax Zoom In Effect. See Figure 1.4:

To create the Parallax Zoom Out effect, we need to reverse the sizes of the images on the second slide but first, we need the exact enlarged and shrank sizes of the images at the beginning of the 2nd slide. I mean, when the slideshow will advance from 1st to 2nd slide then the Boy Foreground.png image size should be 200% and both Hills image sizes should be 75% in the beginning. Then we will shrink the Boy Foreground.png and enlarge the Hills images to create the reverse zoom-out effect.
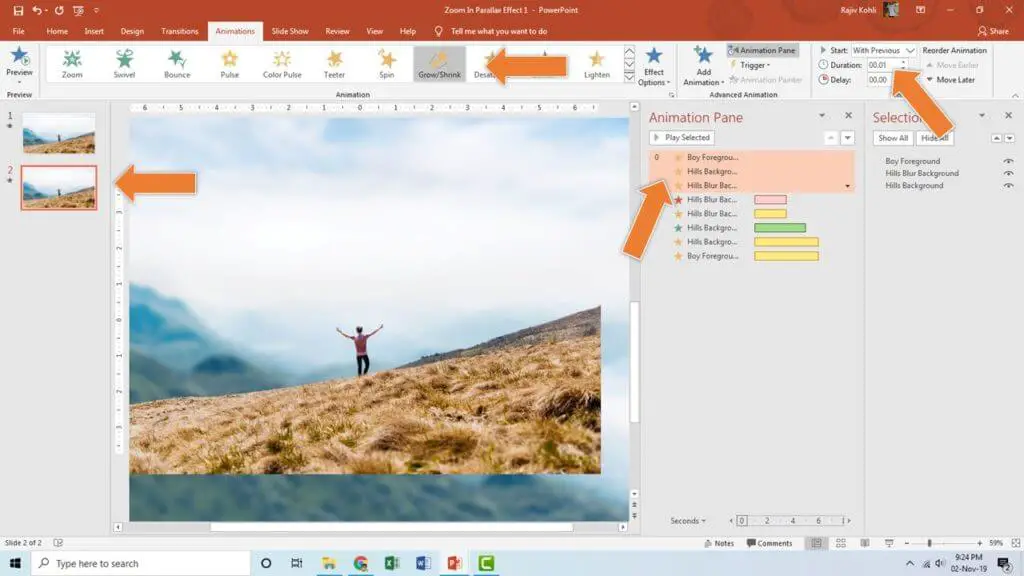
- On the 2nd Slide, we are applying the same Grow/Shrink effect to all the 3 images but with 0.01 Duration. That way, when the slideshow will advance then the images will appear in the same size as they were seen at the end of the first slide.
Note down the positions of the images in the Selection Pane. On the 2nd slide, Hills Blur Background is in the middle because we will first make this image Fade Out and Hills Background will Fade in. The growth/shrink rate will be 133% for both Hills images and 50% for the Boy Foreground. See

- Now, let’s talk about our 2nd Parallax Zoom Effect presentation. In this presentation, we just increase/decreased all the 3 image sizes on the 2nd slide. Like, the Boy Foreground.png image size has been doubled to 17.2 (200% Growth), and both Hills image sizes to 8.71″ (25% Shrink). A Microsoft Excel Worksheet for size calculation example has been included in the download link. So when the slideshow will advance to the 2nd slide, we will see the exact reduced/increased sizes of the images. The rest of the animation effects are similar to Presentation 1.
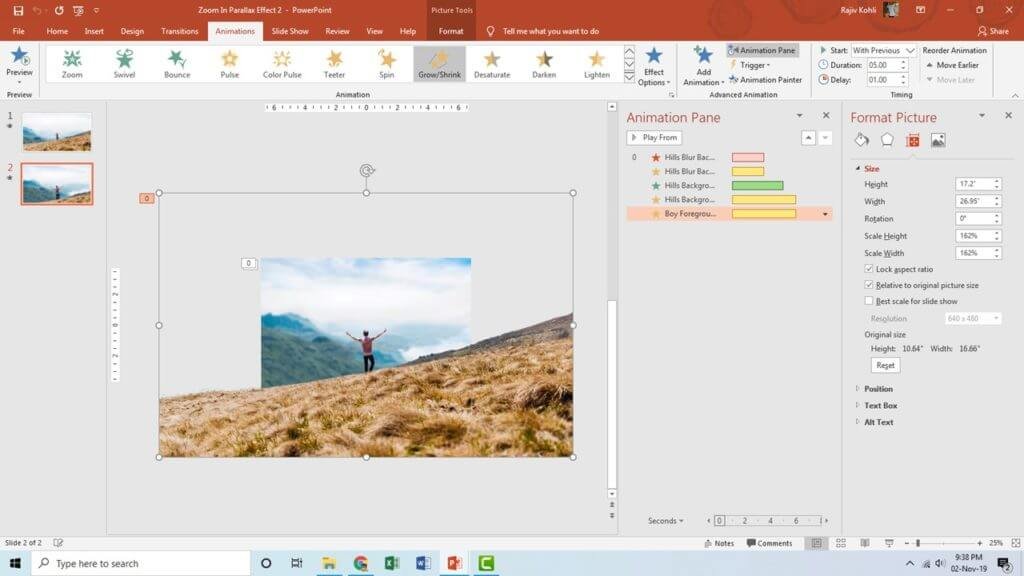
- This trick will remove the glitch that you see in the first presentation when advancing from the first slide to the second.
Parallax Zoom Effect using Morph Transition
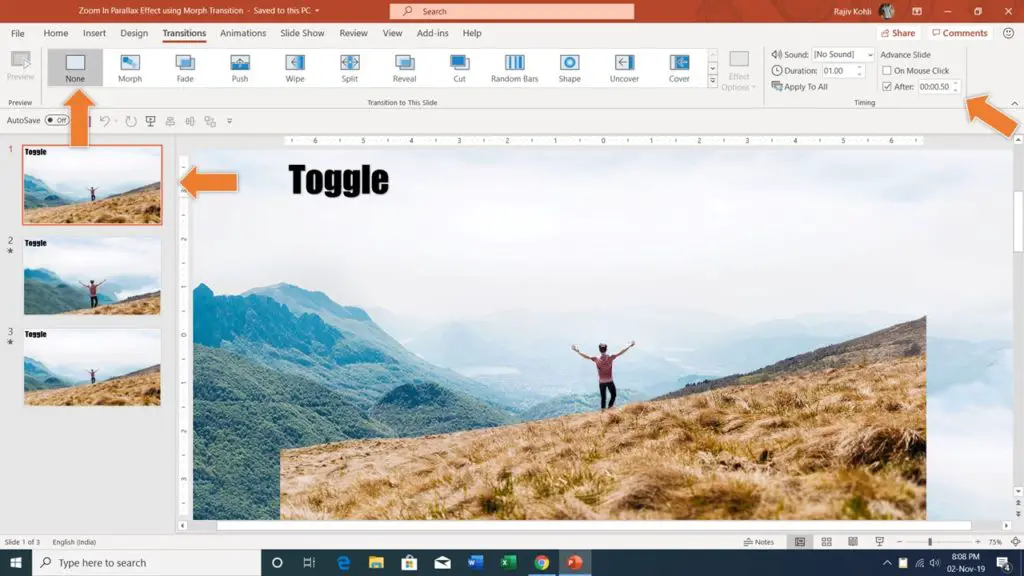
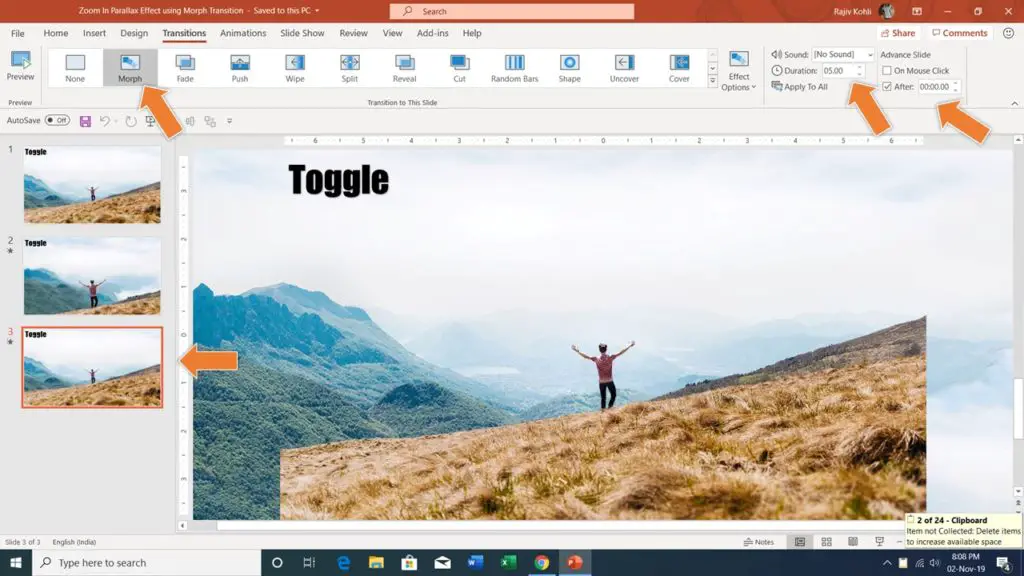
- The 3rd enclosed presentation contains Morph Transition and it is much easier to create the Parallax Zoom effect using Morph. See Figure 2.1:
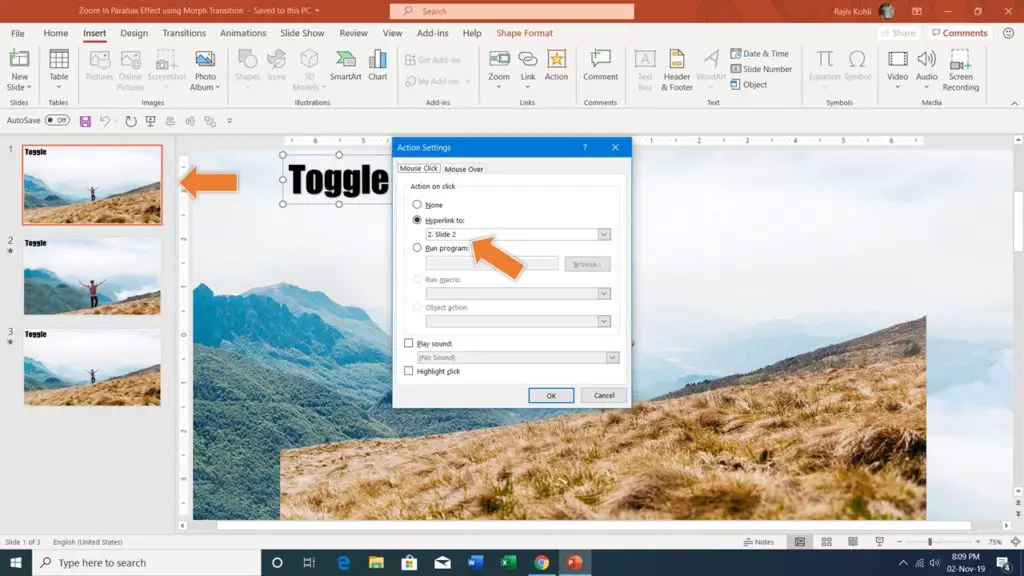
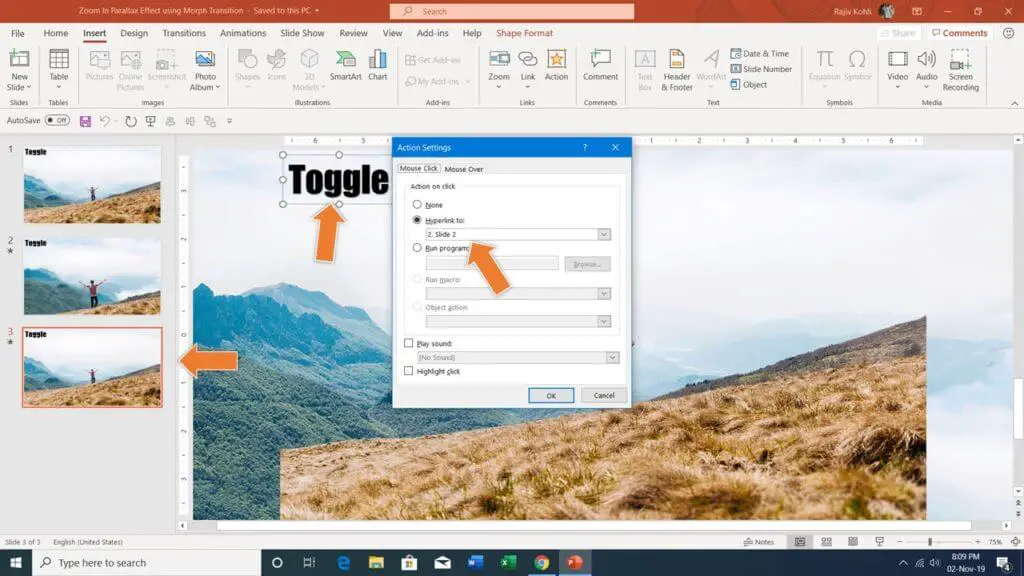
- If you have the Morph Transition available in PowerPoint then you can create this effect just in minutes. After placing the images, the first slide will get visible with No Transition and will remain for 0.50 seconds. According to my point of view, applying Morph to Slide 1 doesn’t make any sense as it will create a Fade In effect. We also applied an Action to the text from the Insert tab – click Action and then on the Mouse click, we are advancing to the next slide. See Figure 2.2
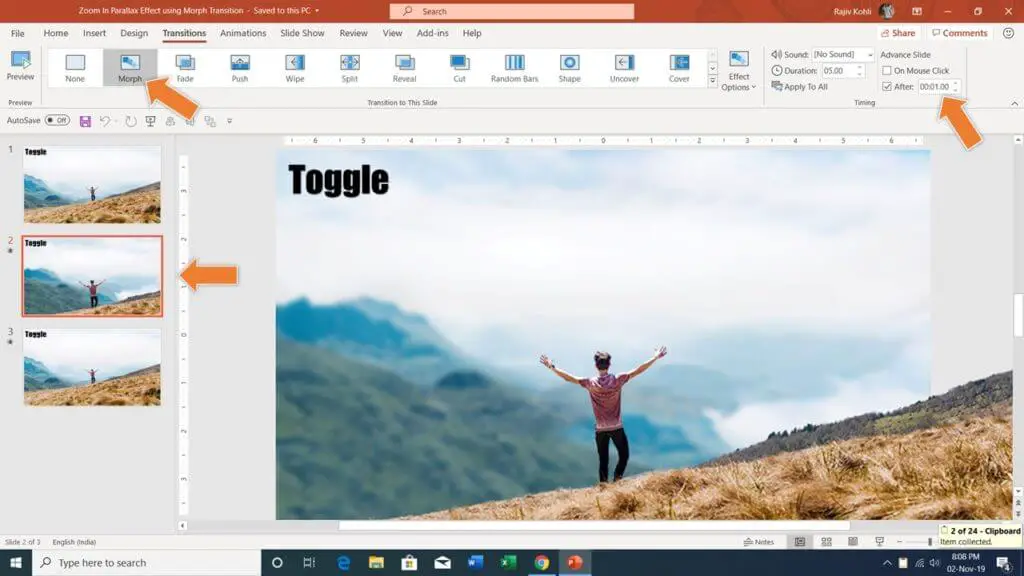
- For Slide No. 2, we are using the Morph Transition with a Duration of 5 Seconds and Advancing to Next Slide after 1 further second i.e. Slide No. 2 will be shown for a total of 6 seconds. See Figure 2.3:
- For the text, we are again Inserting an Action while on Mouse Click advancing to Slide No. 3. See Figure 2.4:
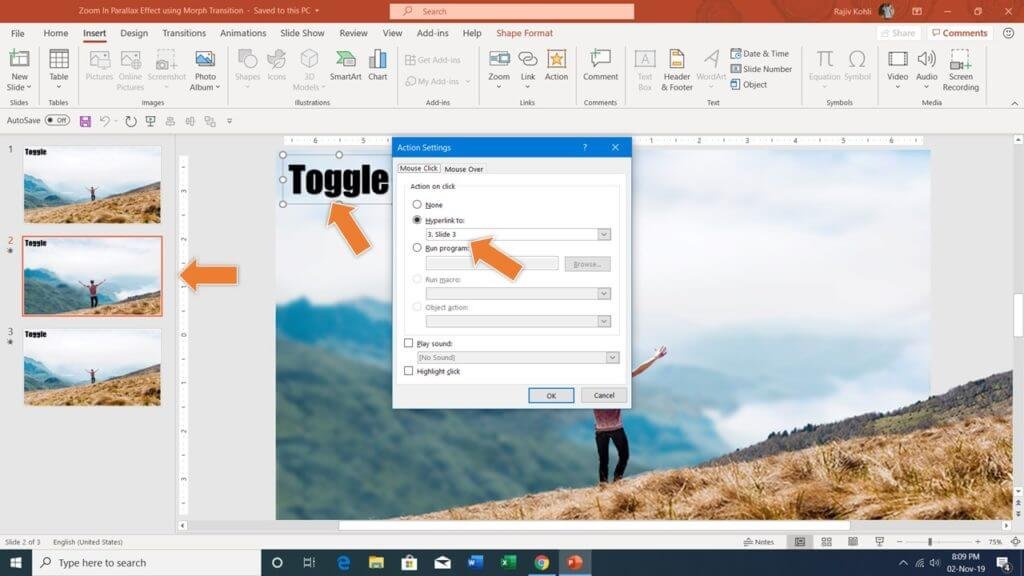
- On Slide No. 3, apply the Morph Transition with a Duration of 5 Seconds and Advance Slide to 0 Seconds. See Figure 2.5:
- Finally, apply the Action Settings to the text as shown in Figure 2.6, where on Mouse Click we are looping back to Slide No. 2.
Finally, here are the results for Parallax Zoom Animation Effects:
I hope you got The Teacher Point!
Watch Parallax Zoom in PowerPoint Tutorial Video
You can create this Parallax Zoom Animation With or Without Morph Transition in the following versions:
- PowerPoint 2007
- PowerPoint 2010
- PowerPoint 2013
- PowerPoint 2016
- PowerPoint 2019


